The biggest mistake in modernizing old homes isn’t the design choices, but fundamentally misunderstanding their original ‘functional grammar’.
- Original features like trim and plaster walls are not merely decorative; they are integral parts of the home’s structural and environmental system.
- Solid masonry walls need to ‘breathe’. Using modern, impermeable insulation can trap moisture, leading to decay and costly damage.
- The ubiquitous ‘open-concept’ layout often destroys a historic home’s intended spatial narrative and can compromise its structural integrity.
Recommendation: Prioritize thoughtful restoration over replacement, and favor ‘broken-plan’ layouts that improve flow without erasing the home’s inherent character and value.
You fell in love with a 1920s house for a reason. It was the elegant archways, the solid feel of the plaster walls, the intricate woodwork that whispered stories of a different era. Yet, you also live in the 21st century. You dream of a brighter kitchen, better flow between rooms, and spaces that accommodate modern life. This is the central dilemma for any heritage property owner: how to introduce contemporary function without performing a soul-stripping exorcism on the very character you cherish.
The common advice is often swift and brutal: knock down walls for an “open concept,” rip out original floors for something new and uniform, and replace drafty old windows. But what if these ‘updates’ are systematically dismantling the home’s value, integrity, and soul? What if the key isn’t to impose today’s trends, but to understand the home’s original functional grammar—its structural logic, material science, and spatial narrative—and learn to translate it for today?
This approach moves beyond simple aesthetics. It’s about a respectful dialogue between past and present. It’s about making smart, pragmatic choices that celebrate the home’s history while making it a comfortable, functional, and beautiful place to live. This guide will walk you through the most critical decisions with a preservationist’s eye and a pragmatist’s mind, showing you how to adapt, not obliterate.
To navigate this complex process, this article breaks down the essential considerations, from preserving small details to making major structural decisions. Follow this roadmap to ensure your renovation honors your home’s past while building its future.
Summary: A Practical Guide to Renovating Your 1920s Home
- Why Removing Original Trim Can Devalue Your Historic Home by 15%?
- How to Mix Modern Furniture into Victorian Interiors Without Chaos?
- Refinish or Replace: What to Do With 100-Year-Old Hardwood Floors?
- The Wall Removal Mistake That Causes Sagging Ceilings in Old Homes
- How to Insulate Brick Walls Without Creating Moisture Traps?
- Open Concept vs Broken Plan: Which Layout Maximizes Usable Volume?
- How to Layer Ambient, Task, and Accent Lighting in a 20m² Kitchen?
- How to Make Low Ceilings Feel Higher Without Structural Changes?
Why Removing Original Trim Can Devalue Your Historic Home by 15%?
Before you take a pry bar to that deep, layered baseboard, it’s crucial to understand that original trim is far more than decoration. In a 1920s home, it’s a core part of the architectural DNA. This woodwork—from baseboards and crown molding to window and door casings—establishes the home’s proportions, style, and sense of substance. Ripping it out in favor of thin, modern profiles is like erasing the key signatures from a piece of music. The house becomes visually flatter, less coherent, and measurably less valuable.
Preservation experts agree that the percentage of original material retained is a key factor in a home’s historic value. The loss of significant original fabric can have a direct financial impact, as its authenticity is a major draw for buyers seeking character. More importantly, removal often causes collateral damage to fragile plaster walls, leading to expensive repairs that far outweigh the cost of restoration. The argument for preservation isn’t just about nostalgia; it’s about smart economics and maintaining the home’s integrity.
Case Study: The California Bungalow Restoration
The owner of a 1920s California Bungalow faced this exact dilemma. After years of thoughtless renovations by previous owners, the original doors, windows, baseboards, and picture rail were among the only historic details left. Instead of replacing them, the owner chose to carefully sand and refinish the existing trim. This decision not only saved significant money compared to the cost of new materials and labor but also restored the home’s authentic charm, proving that restoration is often the more cost-effective and valuable path.
Instead of removal, focus on repair. Techniques like using epoxy consolidants for rotted sections, making “Dutchman” repairs with matching wood for damaged parts, or using heat guns to carefully strip layers of old paint can bring trim back to life. These methods honor the home’s material history and preserve its soul.
How to Mix Modern Furniture into Victorian Interiors Without Chaos?
Placing modern furniture in a historic home can feel intimidating. The fear is creating a space that feels disjointed or, worse, like a sterile furniture showroom that ignores its architectural container. The secret isn’t to mimic the past with reproduction furniture, which can make a home feel like a dusty museum. Instead, the goal is to create a deliberate and respectful dialogue between eras.
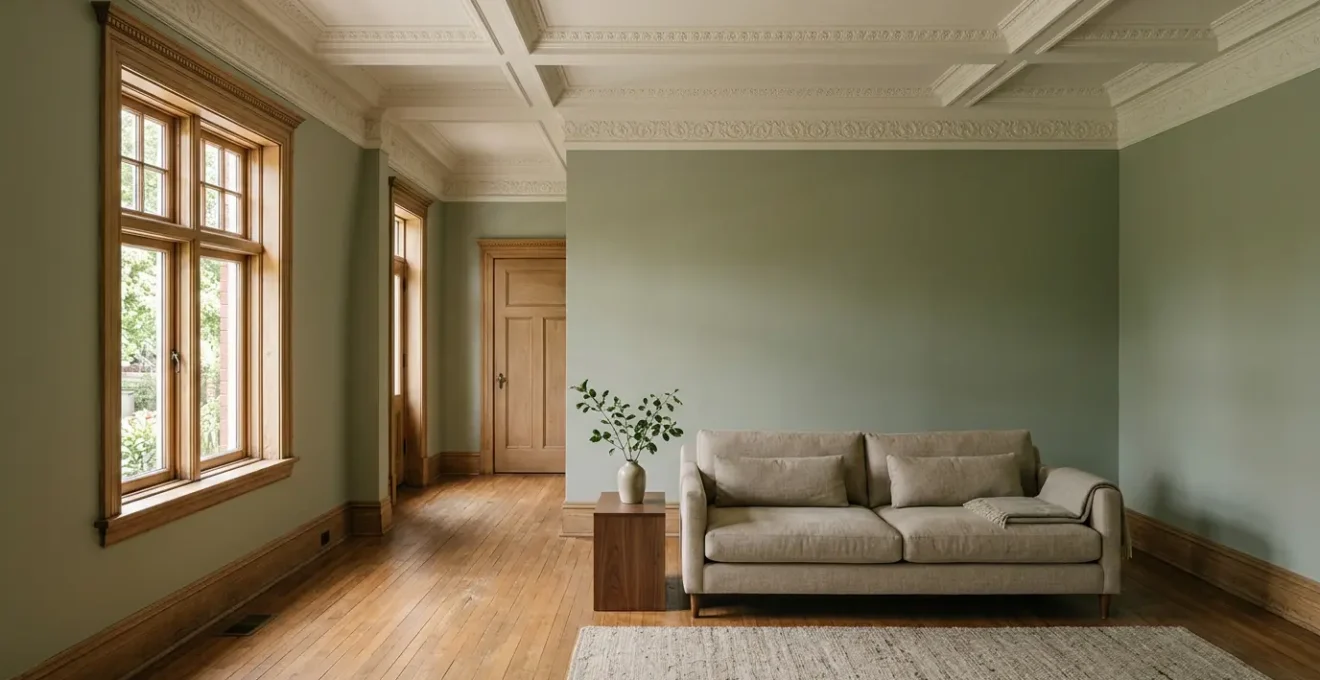
The key is to let the architecture be the star. The ornate moldings, high ceilings, and detailed fireplace mantels of a 1920s home provide a rich, textured backdrop. Against this, clean-lined, contemporary pieces can shine without competing. Think in terms of contrast and scale. A low-profile modern sofa can accentuate the height of a ceiling. The simple geometry of a Scandinavian-style chair highlights the complexity of the original woodwork. Use a unifying element, such as a color from an original tile or a material like wood, to bridge the gap between old and new.
This approach allows for a space that feels both timeless and current. To visualize this balance, consider the interplay of form and scale.
As this image suggests, the success of the pairing lies in restraint. By choosing furniture with a simple silhouette, you give the room’s historic features space to breathe. This intentional contrast celebrates both the craftsmanship of the past and the clean design of the present, creating a harmonious and livable environment.
Case Study: The Tennessee Bungalow’s Modern-Vintage Balance
Designer Holly Thompson masterfully achieved this balance in a 1920s bungalow. She meticulously preserved original elements like doors, doorknobs, and hardwood floors. Then, she introduced modern pieces strategically: sleek, modern light fixtures were placed against retro Schumacher wallpaper, and chic coffee tables sat on layered vintage rugs. By keeping the original finishes while adding fresh elements, she created a space that celebrated both past and present without falling into “museum territory.”
Refinish or Replace: What to Do With 100-Year-Old Hardwood Floors?
The hardwood floors in a 1920s home are often made from old-growth timber that is denser and richer than anything available today. Their tight grain, deep color, and gentle patina of a century of life are irreplaceable. The knee-jerk reaction to scratches, stains, or fading is often to tear them out and replace them with modern engineered flooring. This is almost always a mistake, both aesthetically and financially.
The vast majority of 100-year-old solid hardwood floors can be saved. The key is to assess, not assume. Before making any decisions, determine how much wood is left. If you can’t see nail heads and there’s at least 1/8th of an inch of wood above the tongue-and-groove, the floor has life in it yet. In fact, flooring experts estimate that solid hardwood floors can be sanded for refinishing up to 10 times over their lifespan. Refinishing is significantly less expensive than replacement and preserves a priceless asset.
For floors with only surface wear, a “screen and recoat” can refresh the finish without aggressive sanding. For deeper damage, a full refinish is required. Consider modern, preservation-minded finishes like penetrating hardwax oils, which nourish the wood and are easier to spot-repair than polyurethane, all while providing a beautiful matte finish that highlights the wood’s natural character.
Your Action Plan: Preservationist’s Floor Evaluation
- Check Remaining Wood Thickness: Pull up a heating grate to see the floor’s cross-section. If there’s less than 1/8 inch of hardwood above the tongue and groove or nail heads are visible, the floor likely cannot be sanded again.
- Identify Wood Species: Determine if you have true hardwood (like oak or maple), a softer wood like pine, or engineered wood. Engineered floors typically have a thin veneer that cannot survive aggressive sanding.
- Assess Damage Type: Distinguish between light surface wear, which may only need a screening and recoating, and deep scratches or stains that require a full refinish with a drum sander.
- Consider Alternative Finishes: For maximum preservation, explore penetrating hardwax oils. Unlike polyurethane which forms a plastic layer on top, these oils nourish the wood from within and allow for easy spot repairs, maintaining the floor’s integrity over time.
The Wall Removal Mistake That Causes Sagging Ceilings in Old Homes
The siren song of the “open-concept” layout is powerful. The promise of light, flow, and modernity tempts many owners of historic homes to grab a sledgehammer. However, in a 1920s house, this is one of the most dangerous and irreversible mistakes you can make. The walls in these homes are not simply dividers; they are integral components of the home’s structural system. They were built using different methods, like balloon or platform framing, where interior walls often play a crucial role in supporting the floors and roof above.
Removing a wall without proper engineering analysis can have catastrophic consequences. The most common is a sagging ceiling or a bouncy, uneven second floor, as the joists lose a critical point of support. What seems like a non-load-bearing wall can often be a “bracing” wall that provides lateral stability to the entire structure. Identifying a true load-bearing wall in an old home is a job for a structural engineer, not a contractor with a hunch. The risk of getting it wrong is simply too high, potentially costing tens of thousands of dollars to rectify.
Beyond the structural risk, wall removal destroys the home’s original spatial narrative. 1920s homes were designed as a sequence of distinct rooms, each with its own purpose and character. This progression from a public space like a foyer to a private one like a study creates a sense of discovery and intimacy that is lost in a single, cavernous great room. The acoustics also suffer, as sound bounces uncontrollably in a large, open space.
Case Study: The 1920s Villa and the Crittall Door Solution
To brighten a dark, enclosed hallway in a 1920s villa, the owners needed to improve flow without demolishing structural walls. Instead of a full removal, they installed steel-framed Crittall-style glass doors and partitions. This brilliant solution maintained the home’s spatial definition and structural integrity while flooding the space with light. It created a sense of openness and connection between rooms while preserving the architectural narrative—a perfect example of a thoughtful alternative to destructive wall removal.
How to Insulate Brick Walls Without Creating Moisture Traps?
Historic brick walls are fundamentally different from modern wall assemblies. They are designed to be “breathable.” These old, solid masonry walls manage moisture by absorbing it from the humid air (or driving rain) and then slowly releasing it to the drier side—either inward or outward, depending on the season. This natural process is the reason these walls have survived for a century. The most common and devastating mistake in modernizing them is to treat them like a modern stud wall and insulate them with the wrong material.
Using a vapor-impermeable insulation, such as closed-cell spray foam or a polyethylene vapor barrier, is a recipe for disaster. These materials block the brick’s ability to dry to the interior. Moisture gets trapped within the wall cavity, leading to condensation, mold growth, and, in freezing climates, spalling brick as the trapped water freezes and expands. You’ve essentially created a terrarium for decay inside your walls. The key is to choose an insulation that allows water vapor to pass through it, preserving the wall’s natural breathability.
Vapor-permeable insulation types like mineral wool, cellulose, or natural materials like cork or wood fiberboard are excellent choices. They provide thermal resistance while still allowing the wall assembly to breathe and dry effectively. When renovating, it is crucial to think of the wall as a complete system, where every layer must be compatible. As a general rule, you should use materials that are as permeable or more permeable on the inside of the wall as the materials on the outside. Building science research shows that a WRB permeance in the range of 1 to 10 U.S. perms is often ideal for balanced performance.
The following table, based on data from building science experts, compares common insulation types and their suitability for historic brick walls, highlighting the critical difference between vapor-permeable and impermeable materials.
| Insulation Type | Vapor Permeability | Suitability for Brick | Key Characteristics |
|---|---|---|---|
| Closed-Cell Spray Foam | Vapor Impermeable (Class I) | ⚠️ Use with Caution | Blocks drying, recommended only with exterior insulation or in very cold climates. Can trap moisture behind masonry. |
| Mineral Wool (Roxul) | Vapor Permeable (Class III) | ✓ Good Choice | Allows walls to breathe and dry inward. Non-moisture sensitive, enables natural vapor diffusion. |
| Cellulose (Blown-in) | Vapor Permeable (Class III) | ✓ Good Choice | Enables moisture movement, works well with smart vapor barriers for seasonal moisture management. |
| Cork / Wood Fiberboard | Vapor Permeable | ✓ Excellent Choice | Natural breathability, historically compatible, capillary-active material that can buffer moisture. |
| Polyethylene Sheet | Vapor Barrier (Class I: 0.1 perms) | ✗ Avoid | Traps moisture inside wall cavity. Can cause condensation, mold, and structural decay in historic brick. |
Open Concept vs Broken Plan: Which Layout Maximizes Usable Volume?
For decades, the “open concept” has been hailed as the ultimate solution for modern living. While it can work in new construction, applying it wholesale to a historic home often backfires. It creates a single, large volume that can feel cavernous, acoustically challenging, and devoid of the cozy, human-scaled spaces that define older homes. More importantly, it eliminates functional definition. The dining area bleeds into the living area, which bleeds into the kitchen, resulting in a space that is visually large but functionally chaotic.
A far more intelligent and respectful approach for a 1920s home is the “broken-plan” layout. This design philosophy seeks to increase the sense of light and flow between rooms without completely erasing their boundaries. It’s about creating connections, not demolition. This can be achieved through several clever methods:
- Creating large cased openings: Widen the doorway between a kitchen and dining room, but keep the header and casings to maintain a sense of transition.
- Using interior windows or partitions: A half-wall with columns or a glass partition can create a visual link while still defining the space.
- Strategic sightlines: Aligning doorways so you can see from one end of the house to the other creates a feeling of spaciousness without removing walls.
This approach maximizes usable volume by creating distinct “zones” for different activities, while still allowing for social connection and light sharing. As design-builder Byron Kellar notes, the goal is to create the desired lifestyle within the historic footprint. His insight captures the essence of this philosophy:
There are ways to attractively open up a kitchen to a living space and create the lifestyle that a great room provides but still do it within the footprint of the historic home.
– Byron Kellar, Design-Builder, Neil Kelly Design Commentary on Historic Home Renovation
Case Study: The Omaha Colonial Revival’s Seamless Integration
In a historic 1920s Colonial Revival, an architect was tasked with modernizing the kitchen without destroying the home’s character. Instead of full wall removal, he created a large cased opening to the dining room and made modest, historically appropriate extensions. The result was so seamless that, as noted in a feature by This Old House, ‘you can’t tell where the old building ends and the new parts begin.’ The home gained modern functionality while preserving its sequence-of-rooms narrative and qualifying for the National Register.
How to Layer Ambient, Task, and Accent Lighting in a 20m² Kitchen?
Lighting can make or break a kitchen renovation, especially in a historic home. A single, harsh overhead fixture can make a beautifully restored space feel sterile and unwelcoming. The key to successful kitchen lighting is layering, a three-part approach that ensures both functionality and atmosphere. This is particularly important in a 20m² (approx. 215 sq ft) kitchen, where every element must work hard. The three layers are ambient, task, and accent.
Ambient lighting provides the room’s overall illumination. In a 1920s home, this is your chance to make a style statement. Choose a central, period-appropriate fixture like a schoolhouse pendant or an Art Deco semi-flush mount. This becomes a focal point that anchors the room in its historical context. Task lighting is the functional workhorse. It illuminates work surfaces like countertops and sinks. The best way to add this in a historic kitchen is with concealed, reversible methods like high-quality LED strips hidden under wall cabinets. This provides brilliant light exactly where you need it without disturbing original plaster ceilings. Finally, accent lighting is used to highlight architectural features. Use small spotlights or picture lights to draw attention to glass-fronted cabinets, a section of exposed brick, or beautifully restored trim. This creates depth and visual interest.
Perhaps the most important rule is to maintain a consistent color temperature. Historic materials like wood, plaster, and aged brass look their best under warm light. Follow this simple formula for a layered and historically sensitive lighting scheme:
- Ambient Layer: Start with a central, period-appropriate fixture (e.g., a schoolhouse pendant) with a warm color temperature (2700K-3000K) to provide general light and set the historic tone.
- Task Layer: Install high-CRI (Color Rendering Index) LED strips under cabinets for brilliant, shadow-free illumination on your work surfaces. This is a highly effective and minimally invasive technique.
- Accent Layer: Use strategically placed monopoint spotlights or picture lights to highlight the features you love, such as original glass-front cabinets or a restored backsplash, creating a visual hierarchy.
- Color Temperature Mandate: Exclusively use warm-toned light (2700K-3000K). Cool, blue-toned light (above 4000K) is jarring and makes historic materials feel sterile and lifeless.
Key Takeaways
- Restore, Don’t Replace: Original materials like trim and floors are irreplaceable assets. Refinishing and repairing them preserves value and character.
- Respect Material Breathability: Historic masonry walls need to breathe. Use vapor-permeable insulation like mineral wool or cork to prevent trapping moisture and causing decay.
- Embrace the “Broken Plan”: Instead of complete wall removal, use large cased openings and interior partitions to improve flow and light while maintaining the home’s essential spatial narrative.
How to Make Low Ceilings Feel Higher Without Structural Changes?
Not all 1920s homes boast soaring ceilings. Many bungalows and cottages from the era have more modest proportions, with ceiling heights that can feel low by today’s standards. While you can’t structurally raise the roof without a massive and expensive project, you can use a series of powerful visual tricks to create the illusion of height and airiness.
The strategy revolves around drawing the eye upward and blurring the boundaries between wall and ceiling. One of the most effective techniques is to play with paint. Instead of painting a stark white ceiling and a dark wall, which creates a harsh horizontal line, blur the transition. Paint the walls up to the picture rail (or about 12-18 inches from the ceiling), then paint that upper section and the ceiling itself in the same lighter color. This makes it difficult for the eye to tell where the wall ends and the ceiling begins, making the entire volume feel taller.
Lighting and furnishings also play a critical role. Avoid low-hanging pendant lights, which visually lower the ceiling. Instead, use uplighting—wall sconces that cast light upward or floor lamps aimed at the ceiling—to wash the surface in light and make it recede. Finally, choose furniture and decor that emphasize verticality.
- Visual Horizon Blur Technique: Paint the upper 12-18 inches of the wall and the ceiling the same light color to dissolve the hard boundary and draw the eye up.
- Vertical Lighting Strategy: Use wall sconces or floor lamps that cast light upward, washing the ceiling in light and making it feel more distant. Explicitly avoid low-hanging pendants.
- Floor-to-Ceiling Elements: Install tall, narrow bookcases or hang curtains well above the window frame, letting them fall all the way to the floor to create powerful vertical lines.
- Low-Profile Furniture Selection: Choose sofas, chairs, and media consoles with low backs and a low-slung profile. This maximizes the visible wall space above the furniture, making the ceiling feel further away.
These non-invasive techniques work together to trick the eye, creating a sense of height and openness that transforms a room without touching a single structural beam. They are the final layer in a thoughtful renovation that respects the home’s original scale while adapting it for modern comfort.
By approaching your renovation as a respectful dialogue with the past, you can create a home that functions beautifully for modern life while retaining the irreplaceable character that made you fall in love with it in the first place. To truly honor your home’s legacy, the next step is to begin a thoughtful audit of its unique functional grammar before a single hammer is swung.