The fear of heights in bouldering isn’t conquered by avoiding falls, but by mastering the skill of falling and treating climbing as a mental puzzle.
- Bouldering is often called “physical chess” because it enhances cognitive functions like problem-solving and memory, making it more about strategy than brute strength.
- Learning a specific, controlled falling technique is the most direct way to build confidence and turn fear into a managed risk.
Recommendation: Instead of focusing on getting to the top, focus your first sessions entirely on learning the movements and practicing how to fall safely from low heights.
Looking up at a bouldering wall for the first time is a mix of excitement and intimidation. The colorful holds form a vertical puzzle, inviting you to solve it. But then, you look at the height, and a primal fear kicks in. The fear of falling, of impact, of losing control. For many, this is the single biggest barrier to starting a sport that is incredibly rewarding for both body and mind. The common advice you’ll hear is to “just start low” or “don’t look down,” but these platitudes don’t address the root of the anxiety.
The truth is, bouldering is not about never falling; it’s about learning to fall well. The real secret to overcoming this fear lies in a powerful mental shift. Instead of seeing bouldering as a test of courage against gravity, you must reframe it as a strategic game—a form of physical chess that engages your brain as much as your muscles. This approach transforms the objective from simply reaching the top to mastering a process. It puts you back in control, even when you let go of the wall.
This guide will walk you through that process. We won’t just tell you to be brave. We will provide you with the techniques and mindset to build genuine, earned confidence. We’ll explore why bouldering is a cognitive workout, how to practice falling like a pro, what gear actually supports your learning, and how to build a foundation of technique that protects you from common injuries. By the end, you’ll understand that the goal isn’t to eliminate fear, but to understand it and equip yourself with the skills to manage it effectively.
This article provides a complete roadmap for beginners to build confidence and technique. Explore the sections below to understand the key pillars of starting bouldering safely and intelligently.
Summary: A Beginner’s Guide to Confident Bouldering
- Why Bouldering Is Called ‘Physical Chess’ by Neuroscientists?
- How to Practice Rolling Out of a Fall to Protect Your Ankles?
- Aggressive vs Neutral Shoes: Which Do Beginners Actually Need?
- The ‘Crimp’ Mistake That Blows Out Finger Pulleys in Year One
- Sequence & Plan: Why Resting 3 Minutes Between Attempts Improves Success
- Why Cold Muscles Tear Easier and How Dynamic Moves Warm Them Up?
- Why Bands Feel Harder at the Top of the Movement Compared to Weights?
- How to Read Topographic Maps to Avoid Dangerous Scree Slopes?
Why Bouldering Is Called ‘Physical Chess’ by Neuroscientists?
Before you even touch the wall, the most powerful tool you have is your brain. Many beginners believe bouldering is all about upper body strength, but this is a misconception. The sport is far more akin to chess, requiring visualization, planning, and problem-solving. Each “boulder problem” is a unique puzzle, and your body is the set of pieces you use to solve it. This intense cognitive engagement is not just a feeling; it’s backed by science. Engaging in proprioceptively dynamic activities like climbing, where you must constantly be aware of your body in space, has a profound impact on the brain. For instance, research demonstrates that an eight-week climbing program can lead to a 50% increase in working memory capacity.
This is the essence of cognitive reframing. Instead of seeing a tall wall and feeling fear, you start to see a series of holds and ask, “What’s the most efficient way to get from A to B?” This mental shift from an emotional response to an analytical one is your first line of defense against fear. It channels your focus into the puzzle, not the potential for falling. This process is complex, as noted by the Neuromechanics Research Team in “Neuromechanics of Human Movement: For Learners by Learners”:
Studies using fMRI have shown increased activation in the dorsolateral prefrontal cortex during complex climbing tasks, highlighting how the sport trains higher-order thinking.
– Neuromechanics Research Team, Neuromechanics of Human Movement: For Learners by Learners
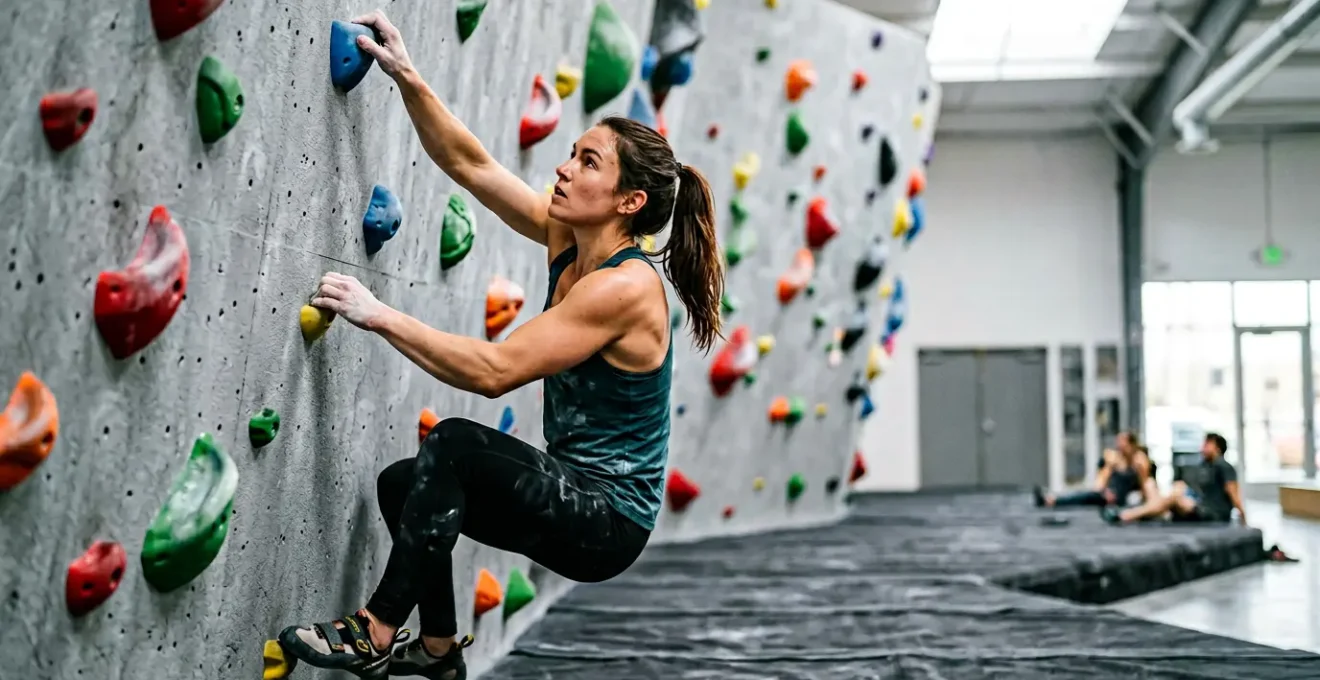
This intense mental focus is what helps you stay present and in control. The goal isn’t to ignore the height, but to become so absorbed in solving the puzzle that the fear becomes secondary. This image shows how a climber’s hands interact with the holds, which is the final step in a long process of mental mapping and route visualization.
As you can see, every grip is a decision. By focusing on the “what” and “how” of your next move, you build a mental framework that prioritizes process over outcome. You’re not just climbing; you’re executing a plan, and that sense of agency is what ultimately builds confidence.
How to Practice Rolling Out of a Fall to Protect Your Ankles?
Confidence on the wall is built on the ground. The single most effective way to manage the fear of falling is to remove the unknown. A fall isn’t an accident; it’s a predictable event in bouldering, and like any other move, it can be practiced and perfected. The goal is to dissipate the force of the impact across your body, rather than letting it shock your joints, particularly your ankles and wrists. This is not about being tough; it’s about being smart and using a technique similar to what gymnasts and martial artists use.
The core principle is to go from a rigid landing to a fluid roll. Instead of landing stiff-legged and upright, you should aim to land with bent knees, absorb the initial impact with your legs, and immediately roll backward or to the side onto the thick crash pads. Your arms should be crossed over your chest to prevent trying to catch yourself with your hands, a common cause of wrist injuries. Fall practice should be a non-negotiable part of every warm-up until it becomes second nature.
Start small and make the movement automatic. Your brain needs to build a new motor pattern that overrides the instinctive “stiffen up” response to a fall. By practicing in a controlled way, you teach your body that falling is a manageable, non-threatening event. This progressive practice builds what we call proprioceptive trust—a deep-seated confidence in your body’s ability to handle the impact safely.
Action Plan: The 4-Level Progressive Falling Practice System
- Level 1 – Ground Practice: Stand on the crash mats. Bend your knees deeply, cross your arms over your torso, and simply sit and lean back into a controlled roll. This teaches the fundamental motion pattern in a completely safe environment. Repeat until the roll feels smooth.
- Level 2 – Low Height Drop: Climb just one or two holds up a boulder problem (your feet should be no more than a foot or two off the ground). Let go and practice the same landing and roll. The goal is to make the transition from feet to back automatic.
- Level 3 – Progressive Height Increase: As you become comfortable, gradually increase your fall height. Climb three or four moves up and repeat. The key is to maintain perfect form with each repetition. If you feel yourself stiffening up, go back to a lower height.
- Level 4 – Directional Falls: Real-world falls aren’t always straight down. Practice falling from a slightly off-balance or sideways position (still from a low height). This prepares your body for unpredictable scenarios and builds comprehensive fall confidence.
Aggressive vs Neutral Shoes: Which Do Beginners Actually Need?
Once you’re committed to the process, the question of gear arises. In a climbing gym, you’ll see experienced climbers wearing tight, severely downturned “aggressive” shoes. It’s tempting to think that this is the gear you need to perform well. However, for a beginner, especially one working on fear and fundamentals, this is a mistake. Aggressive shoes are a specialized tool designed to focus power onto the big toe for standing on minuscule edges on steep, overhanging terrain. They are uncomfortable by design and can mask poor technique by acting as a crutch.
As a coach, my advice is firm: start with neutral or moderate shoes. These have a flat, relaxed profile that allows your foot to sit naturally. This is crucial for two reasons. First, comfort. You’ll be able to wear them for your entire session without pain, allowing you to focus on movement and learning, not on when you can take them off. Second, and more importantly, they force you to develop good footwork. A neutral shoe provides better sensory feedback, teaching you how to trust your feet, how to press through your toes, and how to build essential foot strength. This is another layer of proprioceptive trust. As climbing gear experts state, focusing on fundamentals is key:
Beginners should choose neutral or moderate climbing shoes to focus on developing fundamental footwork and building foot strength without the significant discomfort of aggressive shoes.
– Climbing Gear Experts, What Is an Aggressive Climbing Shoe? (& When to Use Them)
Choosing the right shoe is about choosing the right learning tool. You need a shoe that helps you learn technique, not one that lets you skip it. The following table, based on data from climbing shoe specialists, breaks down the key differences and why neutral shoes are the superior choice for anyone starting out.
| Feature | Neutral Shoes (Beginner Recommended) | Aggressive Shoes (Advanced) |
|---|---|---|
| Toe Profile | Flat, natural foot position | Highly downturned, toes curled |
| Comfort Level | High – can wear all day | Low – removed between climbs |
| Ideal Terrain | Slabs, vertical walls, cracks, long routes | Steep overhangs, small edges, bouldering |
| Skill Development | Builds fundamental footwork, forces proper technique | Can mask poor technique, acts as performance crutch |
| Proprioceptive Feedback | Clear sensory signals for building foot trust | Enhanced power, reduced natural feel |
| Best For | Learning precise foot placement and balance | Maximum performance on difficult terrain (V4-V6+, 5.11-5.12+) |
The ‘Crimp’ Mistake That Blows Out Finger Pulleys in Year One
As you begin to build confidence, you’ll encounter small, challenging holds. The natural instinct is to grab them with a “crimp” grip, where your knuckles are hyperextended and your thumb is often locked over your index finger. While this grip feels strong, it’s also the single most common cause of finger injuries for new climbers. The tendons and pulley system in your fingers are incredibly strong, but they are not prepared for the intense, localized forces of crimping, especially when you are starting out. In fact, research reveals that approximately 33% of all rock climbing injuries involve the finger flexor tendons or their supporting pulleys.
The biomechanics are unforgiving. The A2 pulley, a crucial ligament-like structure that holds the tendon close to the bone, is put under extreme stress during a crimp. To put it in perspective, biomechanical studies show that the A2 pulley experiences up to 36 times more load in a full crimp position compared to an open-handed grip. For a beginner whose connective tissues haven’t adapted, this is a recipe for a “pop”—a tear in the pulley that can lead to months of recovery. The mistake is relying on this grip as a crutch before your body is ready.
The solution is to prioritize the open-hand grip. This involves keeping your knuckles bent and your fingers draped over the hold. It may feel weaker at first, but it trains your forearm muscles and finger tendons in a much safer, more sustainable way. By focusing on open-hand strength from day one, you build a foundation of power that protects your fingers for a lifetime of climbing.
Case Study: Long-Term Injury Prevention Through Open-Hand Training
Dr. Isa Schöffl and elite climber David MacLeod, both with extensive climbing careers, report that after experiencing pulley injuries, they exclusively use open-handed grips and have eliminated crimping from their technique entirely. This shift has allowed them to maintain high-level climbing performance over decades without recurrent finger injuries, demonstrating that open-hand strength can fully replace crimp dependency while protecting long-term finger health.
Sequence & Plan: Why Resting 3 Minutes Between Attempts Improves Success
In the “physical chess” model of bouldering, the time you spend on the ground is just as important as the time you spend on the wall. After a failed attempt on a boulder problem, the instinct is often to jump right back on, fueled by adrenaline. This is one of the most counterproductive things a new climber can do. Your muscles need time to recover their explosive energy (ATP), but more importantly, your brain needs time to process what just happened.
A strategic rest of at least 3 to 5 minutes between hard attempts allows your brain to consolidate the new information. You can use this time for mental rehearsal: visualize the sequence of moves, identify the point where you fell, and conceptualize a different solution. Did you use the wrong foot? Was your body position off? Could you have used a different hold? This “active rest” is where the real learning occurs. As neuroscientists explain, this pause is a critical part of motor learning.
The rest period isn’t passive; it’s when the brain transfers the learnings from the failed attempt from short-term memory into a more durable motor plan for the next attempt.
– Neuroscience Research Team, Neuromechanics of Rock Climbing
This disciplined approach transforms bouldering from a purely physical exertion into a cycle of attempt, analyze, rest, and re-attempt. It fosters a patient, thoughtful mindset that not only leads to more successful climbs but also reinforces your sense of control. When you return to the wall, you’re not just trying again; you’re testing a new hypothesis. This methodical process further diminishes the role of fear and elevates the role of strategy.
This image perfectly captures the essence of a strategic rest. It’s not about exhaustion; it’s about focus. By integrating deliberate rest into your sessions, you respect both your body’s physical limits and your brain’s learning process, leading to faster, safer, and more sustainable progress.
Why Cold Muscles Tear Easier and How Dynamic Moves Warm Them Up?
Jumping onto a difficult boulder problem with cold muscles is like trying to stretch a cold rubber band—it’s brittle and likely to snap. Your muscles, tendons, and ligaments need to be warm and pliable to handle the dynamic loads of climbing. A proper warm-up increases blood flow, raises muscle temperature, and improves the elasticity of your connective tissues, making them significantly more resistant to tears. This is particularly critical for the delicate structures in your fingers and shoulders.
Static stretching (holding a stretch for 20-30 seconds) before a workout is an outdated practice. For climbing, a dynamic warm-up is far more effective. This involves actively moving your body through a full range of motion. Think arm circles, leg swings, and torso twists. This prepares your nervous system for the movements to come. The second part of a great warm-up happens on the wall itself. Your goal is not to get tired, but to activate the specific muscles used in climbing.
The on-the-wall warm-up should be progressive. Start with very easy climbs, focusing on smooth, controlled movement. Pay attention to how your body feels. This isn’t just a physical process; it’s a mental check-in. The amount of warming up required is not trivial; research by Schweizer demonstrates that at least 3 middle to long routes (approximately 100 climbing moves) are needed to properly prepare finger tendons for maximum loads. A thorough warm-up is your first and best defense against injury, which is a key component of building sustainable confidence.
Here is a simple on-the-wall protocol to ensure you’re ready for the session:
- Traverse and Activate: Start by traversing horizontally on large, easy holds. This builds warmth and skill without the mental pressure of height.
- Focus on Technique: Incorporate movement drills. Practice “silent feet” by placing your feet on holds without making a sound. This engages your core and mind, shifting focus to precision.
- Gradual Difficulty: Progress through 3-5 of the easiest graded climbs in the gym. Choose routes with varied movements to activate different muscle groups.
- Maintain Pliability: Perform gentle dynamic stretches like arm swings between your warm-up climbs to stay loose and ready for more challenging problems.
Why Bands Feel Harder at the Top of the Movement Compared to Weights?
As you progress, you’ll want to supplement your climbing with conditioning that directly translates to the wall. While traditional weights are useful, resistance bands offer a unique advantage for climbers. The reason is a principle called accommodating resistance. With a dumbbell, the weight is constant. With a band, the resistance increases as you stretch it. This means the movement is hardest at the end of the range of motion—exactly where climbers often need to be strongest to maintain stability.
This is crucial for developing full-body core tension. On the wall, feeling “glued” to the holds comes from your core’s ability to link your hands and feet into a single, stable unit. When you reach for a distant hold, your body is stretched out, and the forces trying to pull you off the wall are at their greatest. Band exercises mimic this perfectly by forcing you to stabilize against increasing tension. This trains your body to stay tight and controlled, reducing the scary feeling of “swinging out” or losing your footing unexpectedly.
Integrating band work into your routine is a simple way to build functional strength that directly combats the feeling of being out of control on the wall. It reinforces the connection between your limbs and your core, which is the foundation of stable, confident movement. Here are three essential exercises to build that “glued-to-the-wall” feeling.
The following exercises are a great starting point for any climber’s conditioning toolkit:
- Pallof Press: Anchor a resistance band at chest height. Stand sideways to the anchor and press the band straight out from your sternum, resisting the rotational pull. This trains the anti-rotation stability needed when reaching sideways for a hold.
- Dead Bug with Band Resistance: Lie on your back, holding a band anchored overhead. As you extend the opposite arm and leg, the band tension increases, mimicking the feeling of maintaining tension as your body moves away from the wall.
- Band Pull-Apart: Hold a band at chest level with arms extended. Pull the band apart by squeezing your shoulder blades together. This strengthens the upper back muscles, which are critical for posture and pulling power.
Key Takeaways
- Bouldering is a mental game first. Approaching it as “physical chess” shifts focus from fear to strategy and problem-solving.
- Fear of falling is managed by turning falling into a practiced, technical skill, not by avoiding it. Controlled practice builds real confidence.
- Prioritize long-term health over short-term performance. Use neutral shoes to build footwork, an open-hand grip to protect fingers, and take strategic rests to learn effectively.
How to Read Topographic Maps to Avoid Dangerous Scree Slopes?
This title may seem out of place for an article about indoor bouldering, but it holds the ultimate lesson about the skills you are developing. Reading a topographic map to identify hazards like a loose scree slope is an act of risk assessment. It’s about looking at abstract information (contour lines) and translating it into a real-world understanding of safe passage. The cognitive tools you use to do this are the exact same ones you begin honing from your very first day in the bouldering gym.
Every time you read a boulder problem, you are assessing risk. Is that foothold polished and slippery? Is that hold a spinner? Is the landing zone clear? You are learning to distinguish between objective hazards (a genuinely bad hold) and subjective fear (your personal anxiety about a move). This analytical framework, practiced in the controlled environment of a gym, is directly transferable to the much larger and more complex challenges of the outdoors. The gym is your laboratory for developing a robust risk-management mindset.
This connection is frequently observed by experienced instructors who see climbers apply their gym-honed analytical skills to outdoor environments. The process of learning to trust your judgment on the wall is what prepares you to trust your judgment in bigger adventures.
Case Study: Transferring Gym Risk Assessment to Outdoor Terrain
Experienced climbing instructors report that climbers who develop strong route-reading skills in controlled gym environments successfully transfer these cognitive frameworks to outdoor risk assessment. Just as they learn to identify objective hazards in a boulder problem (slippery footholds, poor landing zones), these same analytical tools scale up to outdoor terrain evaluation—reading topographic maps to identify scree slopes, assessing approach dangers, and distinguishing between objective hazards (loose rock) and subjective fear (psychological response to exposure). The gym serves as a cognitive training laboratory for real-world risk management.
Your journey into bouldering is not about conquering a fear of heights. It’s about building a relationship with fear based on skill, knowledge, and trust in a process. By focusing on technique, embracing the mental game, and respecting your body, you transform an intimidating activity into a lifelong practice of problem-solving and self-discovery. The first step is to walk into a gym with this new perspective. Find your local climbing community, take an introductory class, and begin your practice.