Strength training after 50 is the most powerful tool for fighting age-related frailty and maintaining your independence.
- It uniquely builds bone density in a way that common activities like walking cannot, creating true structural integrity.
- Safe, effective progress is achieved through a structured plan focused on gradual increases, not just “lifting light” indefinitely.
Recommendation: Start by understanding your body’s true needs for weight and protein, not by underestimating your potential.
Watching your grandchildren play, you feel a mix of joy and a quiet, nagging worry. Will you always have the strength to lift them up, the stamina to keep up with them, the stability to avoid a fall that could change everything? For many over 50, the fear of growing frail and losing independence is a genuine concern. The common advice is often to “take it easy,” switch to gentle walks, or simply accept a decline in physical ability as inevitable. While well-intentioned, this approach can inadvertently accelerate the very process you’re trying to slow.
These common solutions overlook a fundamental truth about human physiology: our bodies adapt to the demands we place upon them. Sarcopenia, the age-related loss of muscle mass, and osteopenia, the thinning of bone, are not fixed destinies but processes that can be powerfully counteracted. The key is not to avoid stress, but to apply the right *kind* of stress in a controlled, intelligent way. This is where resistance training becomes not just an exercise option, but a critical strategy for longevity.
But what if the real secret to staying strong and independent isn’t about simply staying active, but about strategically rebuilding your body’s foundational resilience? This guide moves beyond the generic advice. It’s built on the principle that by understanding the “why” behind strength training—from stimulating bone growth to managing metabolic health—you can build a safe and effective program. We will explore how to progress without injury, make smart nutritional choices to fuel your efforts, and select the right tools to begin your journey toward a stronger, more capable future.
This article provides a complete roadmap for starting your journey with confidence. Below, you will find a detailed breakdown of each crucial step, from the science of bone density to the practicalities of choosing your first set of weights.
Summary: A Practical Guide to Starting Weightlifting After 50
- Why Lifting Heavy Weights Increases Bone Density Better Than Walking?
- How to Safely Increase Weight Without Risking Joint Injury?
- Machines vs Free Weights: Which Is Safer for Arthritic Joints?
- The Recovery Mistake That Causes Insomnia in Older Lifters
- Problem & Solution: Meeting Protein Needs When Appetite Decreases With Age
- How to Add Rucking (Weighted Walking) to Build Bone Density?
- How to Build a Satiety Plate With the Protein-Fiber-Fat Formula?
- How to Choose Your First Dumbbell Set Without Underestimating Leg Strength?
Why Lifting Heavy Weights Increases Bone Density Better Than Walking?
Many people believe that any weight-bearing activity, including walking, is sufficient for maintaining bone health. While walking is excellent for cardiovascular fitness, it falls short when it comes to significantly increasing bone mineral density. The reason lies in the type and magnitude of the force applied to your skeleton. Your bones are living tissue that remodel in response to stress. To trigger a bone-building response, known as osteogenic stimulus, the load must exceed a certain threshold. It needs to be a signal strong enough to tell your body, “We need to fortify this structure.”
Walking, while beneficial, provides a relatively low and repetitive impact. Your body is highly efficient and quickly adapts to the familiar stress of your own body weight in motion. It doesn’t perceive it as a novel or significant enough challenge to warrant depositing new bone mineral. Think of it as a routine maintenance check rather than a major upgrade. Your structural integrity is maintained, but not substantially improved.
In contrast, lifting weights that are challenging for you creates a much higher peak strain on the bone. When you perform a goblet squat or a deadlift, the combination of the external weight and the powerful contraction of your muscles places a significant mechanical load on your spine and hips—areas highly susceptible to osteoporotic fractures. This high-intensity signal is what activates osteoblasts, the cells responsible for building new bone tissue. It’s a direct message to your body to reinforce its internal scaffolding, making it denser and more resilient to future impacts.
This doesn’t mean you should lift dangerously heavy weights from day one. “Heavy” is a relative term. It means a weight that challenges you to complete a set number of repetitions while maintaining good form. This targeted, high-magnitude stress is precisely what makes resistance training a superior intervention for actively combating age-related bone loss and building a truly robust skeleton.
How to Safely Increase Weight Without Risking Joint Injury?
The number one fear for anyone starting to lift weights after 50 is getting injured. This is a valid concern, but it’s entirely manageable with a smart, systematic approach. The key isn’t to avoid increasing weight, but to do so based on a principle called progressive overload. This simply means gradually increasing the demand on your musculoskeletal system over time so it can adapt and get stronger. The mistake is thinking this increase must be fast or linear.
Before adding more weight, your first priority is achieving movement competency. This means learning to perform foundational exercises like squats, hinges (deadlifts), pushes (overhead press), and pulls (rows) with control and confidence, through a full, pain-free range of motion. Focus on the quality of each repetition, not the quantity of weight on the bar. This builds the neuromuscular coordination that protects your joints.
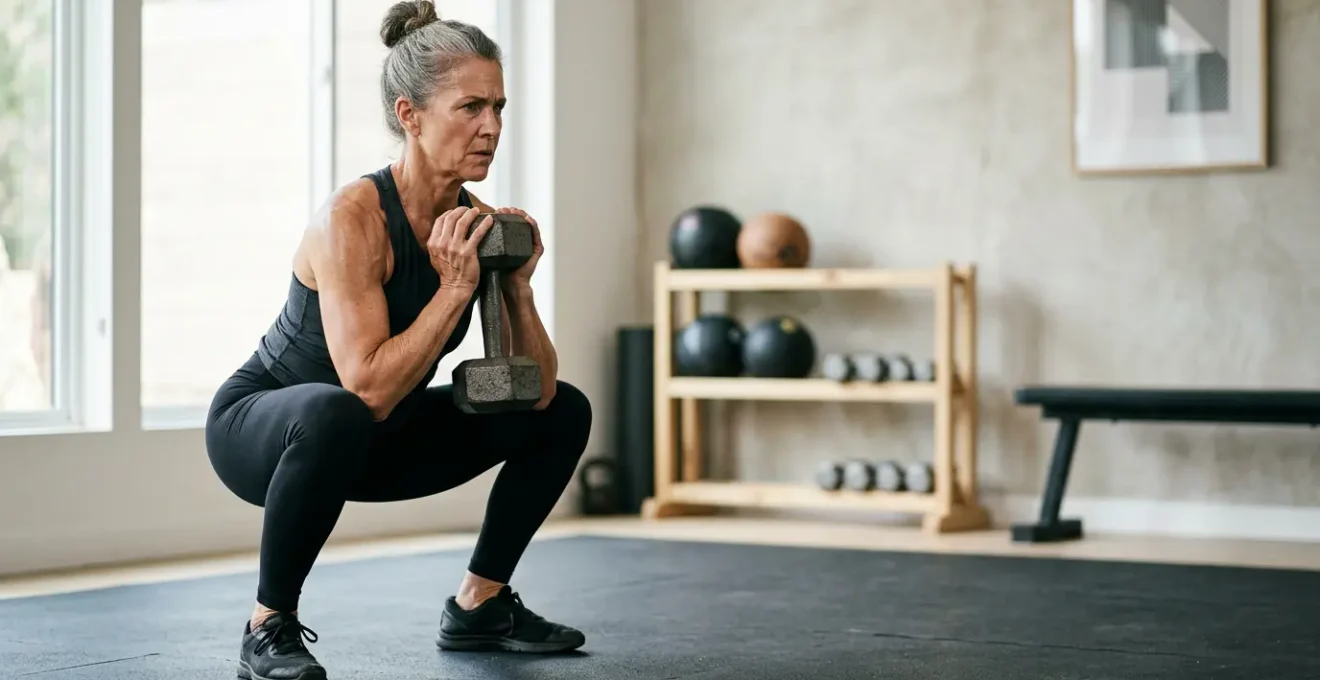
This close-up view demonstrates the importance of a controlled, deliberate grip. Proper form begins with how you hold the weight, ensuring that tension is in the muscles, not straining the joints.
Once you are confident in your form, you can begin to apply progressive overload. However, for older adults, this progression should be patient and multi-faceted. It’s not just about adding more weight. You can also increase the number of repetitions, add an extra set, or decrease your rest time between sets. The goal is to make the workout slightly more challenging than the last one, without making a sudden leap that your joints and connective tissues aren’t prepared for.
Your Action Plan: The Safe Progression Protocol
- Establish a Baseline: If you are new to training or returning from a long break, start at about 50% of your maximum perceived intensity. Choose a weight you can lift for 10-12 repetitions with perfect form, feeling the last two are challenging but not impossible.
- Apply the 10% Rule: As a general guideline, aim to increase the weight you lift by no more than 10% each week. If you successfully completed 3 sets of 10 reps, you can try a slightly heavier weight next time.
- Prioritize Recovery: Always allow at least 48 hours of rest for a muscle group before working it again. This is when your muscles and bones actually repair and get stronger.
- Embrace Non-Linear Progress: Listen to your body. Some weeks you may feel strong and ready to increase, while other weeks it’s best to maintain the same weight or even lighten the load. This is not failure; it’s intelligent training.
- Track Your Work: Use a simple notebook or a fitness app to log your exercises, weights, sets, and reps. This objective data is your best guide for knowing when and how to progress safely.
Machines vs Free Weights: Which Is Safer for Arthritic Joints?
When you walk into a gym, the sheer variety of equipment can be overwhelming. The most fundamental choice is between free weights (dumbbells, barbells, kettlebells) and resistance machines. For older adults, especially those managing arthritis, this isn’t just a matter of preference—it’s a crucial decision for safety and effectiveness. There is no single “best” answer; the ideal choice depends on your experience, specific joint issues, and goals.
Free weights demand that you not only lift the weight but also stabilize it. This forces the small stabilizer muscles around your joints to engage, building a natural “armor” that improves joint stability over time. They also allow you to move through a natural range of motion, which you can adjust to avoid any painful angles. The downside is that they require more knowledge of proper form. Poor technique with free weights can place undue stress on vulnerable joints.
Machines, on the other hand, guide you through a fixed path of motion. This significantly reduces the risk of an acute injury from poor form, making them an excellent starting point for beginners. The guided movement isolates the target muscle and can feel more stable and less intimidating. However, this fixed path can sometimes be a drawback. If a machine’s geometry doesn’t align perfectly with your body’s mechanics, it can force a joint into an unnatural or uncomfortable angle. Research confirms that for building muscle and strength, both modalities are highly effective. A study of trainees over 8 weeks found that free weights and machines produced similar increases in muscle thickness and strength.
A pragmatic approach is often best: use both. You might start with a leg press machine to build foundational quadriceps strength with maximum stability, while using dumbbells for an exercise like a row, where the freedom of movement can be more comfortable for arthritic shoulders. The following table breaks down the key considerations.
This comparison, based on guidance from health authorities, helps clarify which tool might be better for your specific needs, as detailed in a comparative analysis for home equipment.
| Consideration | Free Weights | Machines |
|---|---|---|
| Stabilizer Muscle Engagement | High – builds natural ‘armor’ around joints | Low – isolated movement pattern |
| Range of Motion Control | Full freedom – can adjust to avoid pain | Fixed path – may not suit all body types |
| Safety for Beginners | Requires proper form knowledge | Guided movement reduces injury risk |
| Best for Arthritic Knees | Goblet squat, box squat (adjustable depth) | Leg press (stable, controllable load) |
| Best for Arthritic Shoulders | Dumbbell rows (unilateral, adjustable) | Cable machines (smooth resistance curve) |
| Joint Stress | Can be higher if form is poor | Lower with proper machine fit |
The Recovery Mistake That Causes Insomnia in Older Lifters
You finish a great workout in the evening, feeling accomplished and energized. But when you get into bed, you’re wide awake, staring at the ceiling. If this scenario sounds familiar, you may be making a common but often overlooked recovery mistake: mistiming your training intensity. While exercise is one of the most powerful tools for improving sleep, the wrong kind at the wrong time can have the opposite effect, particularly as we age.
The culprit is cortisol, often called the “stress hormone.” Cortisol follows a natural daily rhythm (a diurnal curve): it’s highest in the morning to help you wake up and gradually declines throughout the day, reaching its lowest point at night to allow for restful sleep. High-intensity exercise is a physical stressor that temporarily elevates cortisol levels. When you do a challenging workout in the morning or afternoon, this cortisol spike is a good thing. It helps mobilize energy, and your body has the rest of the day to bring those levels back down, leading to better sleep at night.
The mistake is performing a very strenuous lifting session late in the evening. This can spike your cortisol levels right when they should be at their lowest. Instead of winding down for sleep, your body is in a state of high alert. Your mind might be racing, and you feel “wired but tired.” This disrupts your ability to fall asleep and can compromise the quality of the sleep you do get, which in turn hinders muscle repair and growth.
The solution is not to stop exercising, but to be strategic about timing and intensity. Moderate physical activity is proven to be beneficial; in fact, a 2022 meta-analysis confirmed that physical activity effectively lowered cortisol and improved overall sleep quality. Try to schedule your most demanding strength workouts earlier in the day. If you must exercise in the evening, opt for lower-intensity activities like mobility work, stretching, or lighter-load technique practice. This allows you to reap the benefits of movement without sabotaging your precious recovery time.
Problem & Solution: Meeting Protein Needs When Appetite Decreases With Age
The problem is a common paradox of aging: just as your body’s need for protein increases to maintain muscle mass, your appetite often begins to wane. This creates a significant challenge for anyone over 50 looking to get stronger. You can have the most perfect workout plan in the world, but without the right building blocks, your body cannot repair and build muscle tissue effectively. This is due to a phenomenon called anabolic resistance.
In younger individuals, a small amount of protein can trigger a robust muscle-building response (muscle protein synthesis). As we age, our muscles become less sensitive to this signal. We need a larger dose of protein in a single meal to “flip the switch” and initiate muscle repair. While younger adults might need 20-25 grams of protein per meal, older adults often require 30-40 grams to achieve the same effect. This increased need is confirmed by research, which shows that to combat sarcopenia, older adults should aim to consume 1.2 to 1.6 grams of protein per kilogram of body weight daily. For a 150-pound (68kg) person, that’s roughly 82-109 grams per day.
So, what’s the solution when you simply don’t feel hungry enough to eat that much? The key is to prioritize protein density over food volume. This means focusing on foods that pack the most protein into the smallest portion. A large salad is healthy, but it might fill you up before you’ve consumed enough protein. Instead, every meal should be built around a substantial protein source.
Focusing on protein-rich foods like lean meats, fish, eggs, and Greek yogurt ensures you meet your daily targets without feeling overly full. This plate composition is a great visual example.
Instead of three large meals, you might find it easier to have three moderate, protein-focused meals and one or two high-protein snacks (like a scoop of whey protein in water or Greek yogurt). This strategy helps you meet your elevated protein requirements without feeling uncomfortably full, providing your muscles with the essential fuel they need to grow stronger.
How to Add Rucking (Weighted Walking) to Build Bone Density?
If lifting heavy weights feels intimidating, or if you’re looking for a complementary activity to perform on your “off” days, rucking is an outstanding option. Rucking is simply walking with a weighted backpack. It brilliantly bridges the gap between walking and traditional strength training, offering a significant stimulus for bone density without the technical demands of lifting.
The added weight in the backpack increases the ground reaction forces with every step you take. This load is transferred up through your legs and into your hips and spine—the precise areas you want to strengthen. It provides a more potent osteogenic stimulus than regular walking, yet it remains a low-impact activity that is generally very safe for joints. It’s a functional, accessible way to apply the principle of progressive overload to an activity you already know how to do.
Getting started is simple, but it’s important to progress gradually to allow your body to adapt. Using a proper rucking backpack or a sturdy backpack with a dedicated weight compartment is crucial. This keeps the weight high and stable on your back, preventing it from shifting and ensuring good posture. Avoid using a flimsy school bag, which can lead to poor weight distribution and back strain. A great starting point is to load the pack with 10% of your body weight.
Follow this simple progression protocol to get started safely:
- Weeks 1-2: Start with 10% of your body weight in a proper rucking backpack. Walk for 20 minutes, twice per week on non-consecutive days.
- Weeks 3-4: Keep the weight the same, but increase the duration of your walks to 25-30 minutes.
- Weeks 5-6: If you feel good, add a third rucking session per week at the current duration and weight.
- Weeks 7-8: Only after you have comfortably mastered the duration and frequency, consider increasing the weight slowly, by just 2-5 pounds (1-2 kg).
- Always Maintain Form: Focus on walking with an upright posture: keep your chest up, shoulders back, and core engaged. The weight should feel like a part of you, not something pulling you backward.
How to Build a Satiety Plate With the Protein-Fiber-Fat Formula?
Meeting your increased protein needs is one part of the nutritional puzzle; the other is building meals that keep you full, energized, and metabolically healthy. A simple yet powerful tool for this is the “Satiety Plate,” built on the Protein-Fiber-Fat formula. This method helps you construct balanced meals that manage blood sugar, prevent overeating, and provide the sustained energy you need to power your workouts and daily life. It acts as your metabolic armor.
The formula is a visual guide for portioning your plate:
- Protein (1/4 of the plate): This is your foundation. As discussed, aim for a palm-sized portion of a high-quality protein source. This is crucial for muscle repair and has a high thermic effect of food, meaning it burns more calories during digestion.
- Fiber (1/2 of the plate): Fill half your plate with non-starchy vegetables. Fiber slows down digestion, which helps stabilize blood sugar levels and promotes a long-lasting feeling of fullness (satiety). This includes leafy greens, broccoli, cauliflower, bell peppers, and zucchini.
- Healthy Fats (a thumb-sized portion): Fats are essential for hormone production and the absorption of fat-soluble vitamins. They also contribute significantly to satiety. Good sources include avocado, olive oil, nuts, and seeds.
By assembling your meals this way, you create a powerful synergistic effect. The protein provides the building blocks for muscle, the fiber provides volume and slows down sugar absorption, and the fat provides long-lasting energy and satisfaction. This combination helps you avoid the energy crashes and cravings that often come from meals heavy in refined carbohydrates. It makes hitting your nutritional goals feel effortless rather than restrictive.
Think of the following chart as a mix-and-match menu for creating your perfect Satiety Plate. Simply choose one item from each column to build a delicious, balanced, and highly satisfying meal that supports your fitness goals.
| Protein (1/4 plate) | Fiber (1/2 plate – non-starchy vegetables) | Healthy Fats (thumb-sized portion) |
|---|---|---|
| Grilled chicken breast | Broccoli | Avocado |
| Salmon | Spinach | Olive oil |
| Greek yogurt | Kale | Almonds |
| Eggs | Brussels sprouts | Walnuts |
| Lean turkey | Cauliflower | Chia seeds |
| Cottage cheese | Bell peppers | Pumpkin seeds |
| Lentils | Zucchini | Tahini |
Key Takeaways
- Resistance training is superior to walking for building bone density due to the high-magnitude stress it places on the skeleton.
- Safe progression after 50 relies on a patient, systematic plan of progressive overload, prioritizing form and recovery over speed.
- Nutrition is non-negotiable; you must consume adequate protein (1.2-1.6g per kg of body weight) to overcome age-related anabolic resistance and enable muscle growth.
How to Choose Your First Dumbbell Set Without Underestimating Leg Strength?
You’re motivated and ready to start. The final hurdle is choosing your first set of weights. This is where many beginners make a critical and costly mistake: they buy a set of dumbbells based on what they can lift for upper body exercises, like bicep curls or shoulder presses. They purchase a pair of 5 or 10-pound dumbbells, only to realize they are completely inadequate for training the largest and strongest muscles in their body: their legs and back.
Your legs are capable of moving significantly more weight than your arms. A weight that is challenging for an overhead press will feel like nothing for a goblet squat. If your equipment doesn’t allow you to properly challenge your lower body, you miss out on the biggest benefits of strength training, including the most powerful stimulus for bone density and the largest boost to your metabolism. Underestimating your leg strength means you’re leaving the most significant results on the table.
So, how do you choose the right starting weights? The best approach is to “test-drive” them before you buy. Go to a local sporting goods store or a gym that offers a day pass. Your mission is not to have a full workout, but to gather data with this simple protocol:
- Test 1 (Legs): Find a single dumbbell and hold it against your chest (a goblet squat). Find a weight you can squat with for 8-10 good, deep repetitions. Note this weight.
- Test 2 (Back): Find a weight you can perform a single-arm dumbbell row with for 8-10 good reps, feeling a strong contraction in your back. Note this weight.
- Test 3 (Shoulders): Find a weight you can press overhead for 8-10 good reps. Note this weight.
- Analyze the Range: You will likely find that the weight for your goblet squat is 3-5 times heavier than the weight for your overhead press. This is the range your dumbbell set needs to cover.
- Make the Purchase: For most people, the most cost-effective and space-saving solution is a set of adjustable dumbbells. These allow you to quickly change the weight from 5 pounds all the way up to 50 pounds or more, accommodating your entire body and giving you room to grow for years to come.
If adjustable dumbbells are not an option, you can start with a few individual pairs. However, be prepared to purchase a heavy dumbbell for squats and a medium pair for rows, in addition to a light pair for smaller exercises. Another clever strategy is to focus on single-leg exercises like Bulgarian split squats, which require less absolute weight but provide a significant challenge through stability demands.
Your journey to a stronger, more independent future starts not in a month, but with the first, informed step. Use this guide to confidently choose your starting point and begin reclaiming your biological resilience today.