The most effective alpine layering system is not a set of clothes, but a dynamic safety protocol integrated into every decision you make at altitude.
- Success depends on proactively managing your “thermal regulation engine” by anticipating terrain and weather, not just reacting to them.
- A failure in your layering—like a soaked base layer or a lost glove—is a critical system failure that often dictates turning back.
Recommendation: Shift your mindset from ‘what to wear’ to ‘how to manage your gear system’ for every phase of your climb, from ascent to recovery and even water breaks.
For any hiker who has mastered lowland trails, the call of a summit is a powerful one. You’ve bought the gear, you’ve studied the route, and you’ve heard the basic advice: wear layers. Most guides will tell you about the “three-layer system” of a base, mid, and shell layer. They’ll warn you that “cotton kills” and to be prepared for anything. While this advice isn’t wrong, it’s dangerously incomplete. It treats layering as a static checklist, not the dynamic, life-sustaining skill it truly is.
The fundamental flaw in common advice is that it focuses on the *what* (the gear) instead of the *when* and *why* (the protocol). In an unpredictable alpine environment, your layering system is your primary interface with the mountain. It’s your thermal regulation engine, your first line of defense against hypothermia and frostbite, and a critical input for your decision-making. Thinking of it as just “clothes” is the first mistake a low-elevation hiker makes when stepping up to high-altitude challenges.
This guide reframes the conversation. We will not give you a simple packing list. Instead, we will treat you like a mountaineer in training, exploring how a truly effective layering system integrates with every facet of a high-altitude expedition. We will analyze how your gear choices impact physiological acclimatization, how to use a map to predict your layering needs, how recovery is tied to your insulation, and when a failure in your gear system becomes a non-negotiable reason to turn back. This is not about what to buy; it’s about how to think.
To navigate this crucial topic, this article is structured to build your expertise from the ground up. The following sections break down how your layering protocol applies to the most critical aspects of mountain safety, providing a comprehensive framework for your first summit attempt.
Table of Contents: A Guide to Alpine Layering Protocol
- Why You Must ‘Climb High, Sleep Low’ to Avoid Edema?
- How to Read Topographic Maps to Avoid Dangerous Scree Slopes?
- Mountain Huts vs Wild Camping: Which Allows Better Recovery?
- The Thirst Mechanism Failure: Why You Don’t Feel Thirsty at Altitude?
- When to Turn Back: The ‘Turnaround Time’ Rule That Saves Lives
- Why Wool Wicks Moisture Better Than Polyester for Winter Layering?
- Evacuation vs Medical: What Insurance Do You Really Need for 5000m Altitude?
- How to Filter Turbid Water Using Natural Materials Found in the Woods?
Why You Must ‘Climb High, Sleep Low’ to Avoid Edema?
The mantra “climb high, sleep low” is the cornerstone of physiological acclimatization, the process by which your body adapts to lower oxygen levels. The goal is to stress your body by ascending to a new altitude during the day, then allow it to recover and build more red blood cells by sleeping at a lower elevation. However, this process only works if your body has the energy to adapt. If you’re constantly fighting off the cold, your body is wasting precious metabolic resources on thermoregulation instead of acclimatization. This is where your layering system becomes a critical enabler of high-altitude health.
Your layering protocol must be dynamic. During the “climb high” phase, you need a highly breathable system that wicks sweat effectively to prevent chilling when you stop. As you descend to “sleep low,” your system must shift to prioritize insulation and recovery. This means adding a dry, static insulation layer like a down or synthetic puffy jacket the moment you reach camp. Allowing your body to be warm and comfortable is not a luxury; it is a prerequisite for effective acclimatization and avoiding altitude-related illnesses like edema. In fact, research shows that the climb high sleep low method can lead to a 30% reduction in the incidence of Acute Mountain Sickness (AMS).
Case Study: Rapid Ascent Using Pre-Acclimatization
A field study demonstrated the power of this strategy when climbers prepared in the Alps before tackling Ojos del Salado (6,893m) in Chile. By making strategic sojourns up to 5,700m and returning to lower camps to recover—a process supported by an efficient layering system to manage comfort—they successfully summited the peak within 5 days without health issues. This proves that proper acclimatization, enabled by smart thermoregulation, is the key to high-altitude success.
The image below captures the essence of the “sleep low” recovery phase. After a hard day’s climb, the mountaineer is using their insulated layers not just for comfort, but as a strategic tool to aid physiological recovery at a lower altitude camp. This moment of warmth is as crucial as the climb itself.
Notice the use of a substantial belay parka and the rising steam from a hot drink. Every element is part of a deliberate strategy to restore the body’s energy reserves. This allows the biological adaptations to altitude to occur efficiently, reducing the risk of HAPE (High Altitude Pulmonary Edema) and HACE (High Altitude Cerebral Edema), both of which are life-threatening conditions.
Ultimately, your layering system isn’t just protecting you from the external environment; it’s creating the internal environment your body needs to adapt and survive.
How to Read Topographic Maps to Avoid Dangerous Scree Slopes?
An expert mountaineer uses a topographic map for more than just navigation; they use it to predict the future. By reading the contour lines, aspects, and symbols, you can forecast the terrain’s demands and, crucially, the corresponding demands on your layering system. This is the essence of proactive layering: adjusting your system *before* the environment forces you to. Scree slopes, while a navigational hazard, also represent a specific metabolic and thermal challenge that can be anticipated and managed.
A steep, loose scree slope often means a high-output, slow-progress ascent. Your body will generate immense heat, but your speed will be low. This is a classic scenario for overheating and soaking your base layer with sweat. A glance at the map showing tightly packed contour lines in an open, sunny aspect should trigger a pre-emptive layering adjustment. Before you even set foot on the scree, you should strip down to your lightest wicking base layer, ensuring your shell and mid-layers are accessible at the top of your pack for when you gain the ridge and are hit by the wind.
This contrasts with identifying a long, shaded traverse on a north-facing aspect. The map tells you this area will be colder and potentially icy. Here, you ensure your active insulation layer is on *before* you enter the shade, preventing the initial shock of cold that drains energy. The map becomes your script for the day’s layering performance. By reading it correctly, you can stay ahead of your body’s needs, conserving energy and staying dry, which is the ultimate goal of any layering system.
Your Action Plan: Map-Based Layering Decisions
- Points of contact: Identify dense contour lines on north-facing aspects indicating steep, shaded, icy climbs that require active insulation layers.
- Collecte: Locate wide-spaced contour lines suggesting open ridges with high wind exposure demanding robust shell layer protection.
- Cohérence: Mark cols and saddles (converging contour lines), which act as wind funnels requiring pre-emptive layering adjustments.
- Mémorabilité/émotion: Differentiate high-output scree slope ascents (start cold, prioritize breathability) from steady-state glacier traverses (prioritize UV and wind protection).
- Plan d’intégration: Ensure your wind shirt or shell layer is immediately accessible in your pack before reaching identified exposure points on the map.
This skill transforms the map from a simple directional tool into a sophisticated instrument for managing your body’s energy and comfort, preventing you from making reactive, and often late, layering mistakes.
Mountain Huts vs Wild Camping: Which Allows Better Recovery?
The choice between staying in a mountain hut and wild camping (or bivouacking) is not just a stylistic preference; it has profound implications for your gear weight, your layering strategy, and ultimately, your ability to recover. From a purely physiological standpoint, a mountain hut offers an undeniable advantage for recovery. It provides a warm, dry environment where your body can dedicate 100% of its energy to rest and repair, rather than thermoregulation.
When using a hut system, your layering strategy changes. Your pack is significantly lighter because you aren’t carrying a tent, sleeping pad, or stove. This saved weight and energy is significant. Your “recovery layers” can be dedicated comfort items: a fresh, dry merino base layer, insulated down booties, and fleece pants. You have the luxury of completely drying out any damp gear from the day’s hike. This is a massive advantage, as starting the next day with dry layers is critical for safety and morale. Hut systems are highly developed in many alpine regions; for example, the Norwegian Trekking Association maintains over 600 mountain cabins, making multi-day treks far more accessible.
Wild camping, by contrast, demands a more robust and multi-functional layering system. Every item must serve multiple purposes. Your belay parka—a heavily insulated jacket designed to be thrown over all your other layers—is not just for rest breaks; it becomes a critical component of your sleep system, augmenting the warmth of your sleeping bag. Your waterproof shell pants might be pulled on over your sleeping bag to add a few degrees of warmth and protect against condensation. Recovery is an active process of gear management, not a passive state of rest.
The following table breaks down the key differences in how each system impacts your gear and recovery strategy.
| Recovery Factor | Hut System | Bivy/Wild Camping System |
|---|---|---|
| Base Weight | Lighter (no tent/stove) | Heavier (+1-2kg tent, stove, fuel) |
| Layering Strategy | Dedicated comfort items (down booties, fresh base layer, merino leggings) | Multi-use approach (belay parka augments sleeping bag, shell pants as extra insulation) |
| Moisture Management | Dry environment for gear drying, access to heat sources | Active management required (body heat drying, vapor barrier liner) |
| Thermal Efficiency | Consistent warm environment, less gear needed | Variable conditions, every item must serve multiple functions |
| Recovery Quality | Better sleep quality, protected environment, meals provided | More exposure to elements, requires active camp management |
For a first-time high-altitude hiker, using a hut system can dramatically increase your margin of safety and chance of success by simplifying the complex equation of overnight recovery.
The Thirst Mechanism Failure: Why You Don’t Feel Thirsty at Altitude?
One of the most insidious dangers of high altitude is dehydration, not because water is scarce, but because your body’s own safety signals fail. At sea level, your thirst mechanism is a reliable indicator of your need for fluids. At altitude, this mechanism becomes blunted. A combination of factors, including the cold, dry air causing increased respiratory fluid loss and physiological shifts in your kidneys, means you simply don’t feel thirsty, even when you are becoming dangerously dehydrated.
This is a critical safety issue. Dehydration thickens your blood, makes you more susceptible to frostbite, and significantly accelerates the onset and severity of Acute Mountain Sickness (AMS). Your layering system plays a subtle but important role in this equation. A body that is even slightly chilled will work to conserve heat by constricting blood vessels in the extremities (vasoconstriction), a process that can further suppress the sensation of thirst and increase urine output (cold diuresis). Therefore, maintaining core body warmth through a proper layering system is an indirect but essential part of your hydration strategy.
Because you cannot trust your body’s signals, you must treat hydration as a technical task, not an instinctual one. The rule is to drink proactively and monitor your output. As a guide, altitude experts recommend consuming at least 4 quarts (approximately 4 liters) of water daily. This is not a suggestion; it’s a critical safety protocol. You must force yourself to drink even when you don’t want to. As one authority in the field puts it, the goal is simple and clear:
Hydration is also critical for acclimation, so make sure your urine is clear and copious.
– Mountain Professor, Acclimatization guidelines for high altitude
You must schedule water breaks and drink a set amount, whether you feel like it or not. Keeping your water from freezing, by using insulated bottles or keeping a bladder inside your jacket, is another part of this system. Don’t let your body’s silence on thirst fool you into a state of critical dehydration.
Treating hydration as a scheduled, mandatory task is as important as any piece of gear you carry. It’s a non-negotiable component of high-altitude safety.
When to Turn Back: The ‘Turnaround Time’ Rule That Saves Lives
Getting to the summit is optional; getting down is mandatory. This is the first rule of mountaineering, and it is enforced by a simple, brutal tool: the pre-determined turnaround time. This is the absolute latest time you have decided—in the calm, rational light of morning—that you will turn around and head for safety, regardless of whether you have reached the summit. Summit fever, the irrational desire to push on against all odds, has killed more climbers than any crevasse. The turnaround time is the antidote. But time is not the only objective trigger to turn back. A failure in your gear layering system is just as critical a signal.
The Centers for Disease Control and Prevention states it with chilling clarity, framing the importance of self-rescue and rational decision-making:
There is no reason for anyone to die from altitude illness unless they are trapped by weather or geography in situations where descent is impossible and treatment is inaccessible.
– Centers for Disease Control and Prevention, CDC Yellow Book: High-Altitude Travel and Altitude Illness
This statement underscores your responsibility. You are not a passenger; you are the pilot. A critical part of that responsibility is recognizing when your equipment—your life support system—has failed. A soaked base layer that is now chilling you to the core is not an inconvenience; it’s a system failure. A zipper breaking on your shell jacket in worsening wind is a system failure. Losing a glove and exposing your hand to frostbite is a system failure.
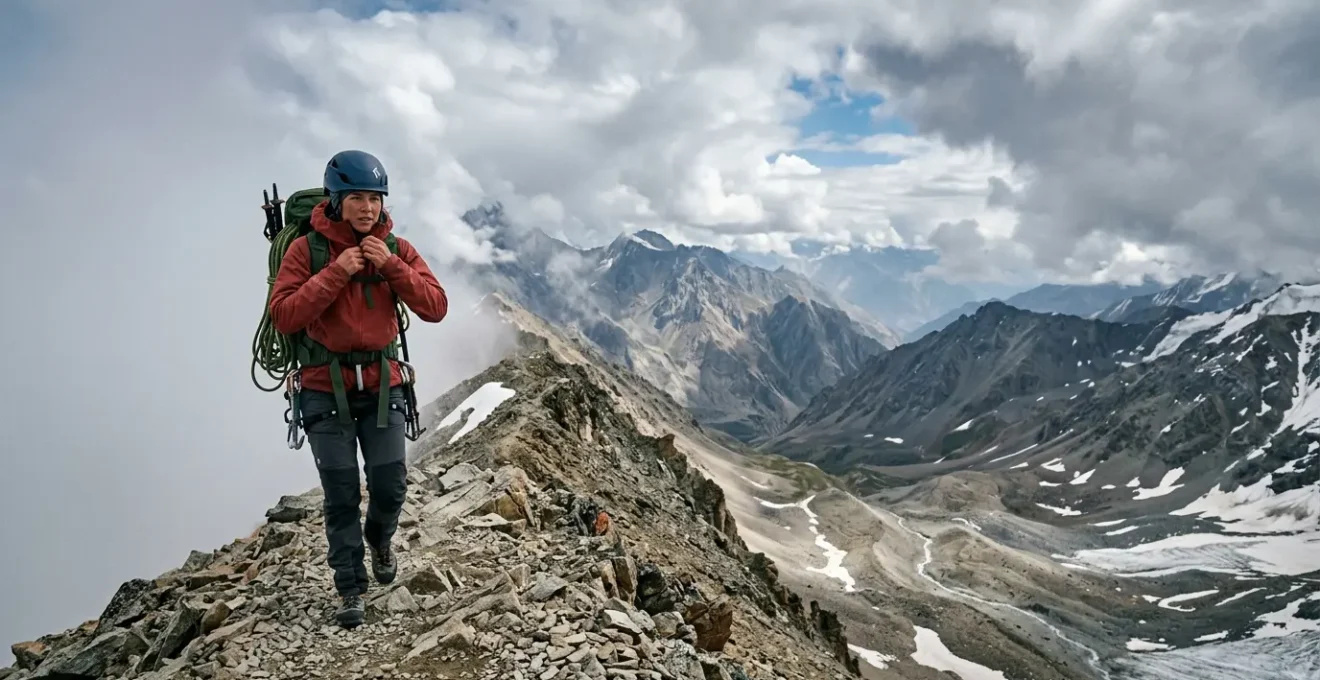
The image below depicts this moment of truth. A climber on an exposed ridge, with deteriorating weather on one side and the path to safety on the other, must make the call. This is where ego dies and protocol takes over.
Your layering system provides objective, non-negotiable data points for this decision. If any of the following occur, your decision has been made for you. It’s time to turn back.
- Primary insulation layer is soaked through and no longer providing warmth.
- Shell layer is completely wetted out and no longer waterproof.
- A critical glove is lost or damaged beyond function, exposing hands to frostbite risk.
- A zipper fails on a key layer (shell jacket or insulated parka), compromising weather protection.
- Emergency shelter or bivy sack must be deployed, indicating a total failure of the primary system.
Recognizing and acting on a system failure is a sign of a professional, safety-obsessed mountaineer, not a quitter. The mountain will be there tomorrow. Make sure you are too.
Why Wool Wicks Moisture Better Than Polyester for Winter Layering?
At the heart of your thermal regulation engine is the base layer. Its one and only job is to move sweat away from your skin to keep you dry. A wet body is a cold body, and the difference between an effective and ineffective base layer material can be the difference between a successful summit day and a hypothermic retreat. The two primary contenders for this job are merino wool and synthetic polyester, and they work in fundamentally different ways.
Polyester is hydrophobic, meaning it hates water. It doesn’t absorb moisture; it simply provides a pathway for liquid sweat to move from the high-pressure area near your skin to the low-pressure area on the fabric’s exterior, where it can evaporate. This process is fast and efficient, which is why polyester is favored for high-output, hot-weather activities. However, it can feel clammy when saturated, and it famously begins to smell quickly as bacteria thrive on its surface.
Merino wool, on the other hand, is hygroscopic. The core of each wool fiber can absorb up to 30% of its own weight in water vapor *without feeling wet* to the touch. It actively pulls moisture vapor away from your skin before it even condenses into liquid sweat. The outer surface of the fiber remains water-repellent, aiding in the transfer of moisture to the next layer. This unique mechanism allows wool to regulate temperature incredibly well; it keeps you warm even when it’s damp and feels drier against the skin during intense exertion. Furthermore, wool’s complex chemical structure is naturally anti-bacterial, meaning it can be worn for days without retaining odor—a significant advantage on multi-day trips.
So, how do you prevent sweating while hiking uphill in the cold? You can’t, and you shouldn’t try. Sweating is a natural cooling mechanism. The goal is not to stop sweating, but to manage it. This is done by “starting cold”—beginning your hike slightly chilled, knowing your body will warm up—and choosing a base layer that manages moisture effectively. For the variable output of alpine climbing, the superior temperature regulation and comfort-when-wet properties of merino wool often give it the edge over polyester, despite polyester’s faster drying time when completely soaked.
Choosing the right base layer material for the conditions and your personal metabolism is the first step in building a reliable, high-performance layering system.
Evacuation vs Medical: What Insurance Do You Really Need for 5000m Altitude?
The question of insurance for high-altitude mountaineering often focuses on helicopter evacuation costs and medical bills. While having a policy that covers search, rescue, and treatment at altitude is an absolute necessity, this conversation starts at the wrong place. It focuses on the cure, not the prevention. The best insurance policy you can have is a meticulously planned and flawlessly executed gear layering system.
The vast majority of preventable emergencies that lead to evacuation are rooted in failures of thermoregulation. Hypothermia and frostbite are not sudden accidents; they are the result of a cascade of small failures: getting wet and staying wet, not adding layers when stopping, underestimating wind chill, or losing a critical piece of gear like a glove. These are layering system failures. A robust insurance plan is your last line of defense, but your layering protocol is your first, second, and third.
The primary role of your layering system, from an emergency prevention standpoint, is to protect against the two most common preventable claims: frostbite and non-freezing cold injuries. This requires a systems-based approach to your extremities and your core.
Case Study: Preventative Layering as Primary Defense
An analysis by the CDC on high-altitude illness prevention emphasizes that a robust extremities layering system is the primary defense against frostbite. This means not just one pair of gloves, but a system: thin liner gloves for dexterity, insulated main gloves for warmth, and waterproof over-mitts for ultimate protection. For feet, it’s liner socks and thick wool socks inside properly sized boots. The CDC also identifies static insulation parkas (belay jackets) and emergency bivy sacks as life-saving tools during the critical waiting periods of a rescue, preventing a simple injury from escalating into fatal hypothermia. Proper gear preparation, they conclude, is the most effective way to prevent the need for evacuation in the first place.
Therefore, when selecting insurance, you must have coverage for evacuation above the maximum altitude of your climb. But your first and most important investment should be in the knowledge and equipment to manage your own warmth and safety. A $700 down parka that keeps you alive while waiting for a rescue is infinitely more valuable than a $100,000 helicopter ride that arrives too late.
Don’t just plan for failure by buying insurance. Plan for success by mastering your personal thermal regulation system.
Key Takeaways
- Your layering system is not a static outfit; it is a dynamic safety protocol that must be managed proactively.
- Every decision at altitude—from navigation to hydration—is intertwined with your thermal regulation and layering choices.
- A failure in your gear (e.g., a soaked layer, a lost glove) is a critical system failure and an objective trigger to consider turning back.
How to Filter Turbid Water Using Natural Materials Found in the Woods?
While knowing how to improvise a water filter from natural materials is a valuable survival skill, in a planned alpine expedition, it represents a significant failure of your primary systems. Your focus should be on using your modern, reliable filter or purification system effectively. And like every other task in the mountains, even something as simple as stopping to filter water requires a specific layering protocol to maintain safety and efficiency. This is a perfect micro-example of the “static vs. metabolic” insulation concept in action.
When you are hiking, your body is a furnace, generating metabolic heat. Your layering system is designed to vent this excess heat and moisture. The moment you stop, that furnace shuts off. You are now a static object, rapidly losing heat to the environment. A ten-minute stop to filter water can be enough to induce significant chilling if managed improperly, draining energy and increasing the risk of hypothermia.
The correct protocol is a conscious, deliberate sequence of actions tied to the task. Before you even take your pack off, you should add your “static insulation” layer—your big, warm belay parka. You put it on *before* you get cold. Then, you perform the task: get out your filter, pre-filter the turbid water through a bandana or piece of clean base layer to protect your filter’s cartridge, and fill your bottles. You do this while positioned on an insulating surface, like your pack or a rope bag, to prevent heat loss to the cold ground. Only when the task is complete and you are ready to move again do you remove the static layer and pack it away. This proactive management of warmth is the difference between an efficient rest stop and the start of a dangerous downward spiral in core temperature.
This same logic applies to any static task: a snack break, a navigation check, or waiting for a partner on a rope. The protocol must become second nature.
- BEFORE stopping: Anticipate the need for insulation.
- IMMEDIATELY upon stopping: Add your static insulation layer (belay parka).
- DURING the stop: Perform the task while insulated from the ground.
- BEFORE resuming: Remove the static layer to prevent overheating.
Mastering this micro-routine for every stop you make is one of the most effective ways to improve your safety, comfort, and endurance in the alpine environment.