The best adjustable dumbbells for a small apartment are not the cheapest upfront, but the ones offering the most cost-effective expansion path for long-term strength gains.
- Selectorized dumbbells (like PowerBlock) offer faster changes, while spin-lock models (like Ironmaster) provide greater durability and a higher weight capacity for a similar total investment.
- Focusing on grip technique and proper core bracing is more critical than just “sucking in,” as it prevents the most common home workout injuries.
Recommendation: Before buying, calculate the total cost to reach at least 75 lbs per hand, as underestimating your leg strength is the most expensive mistake you can make.
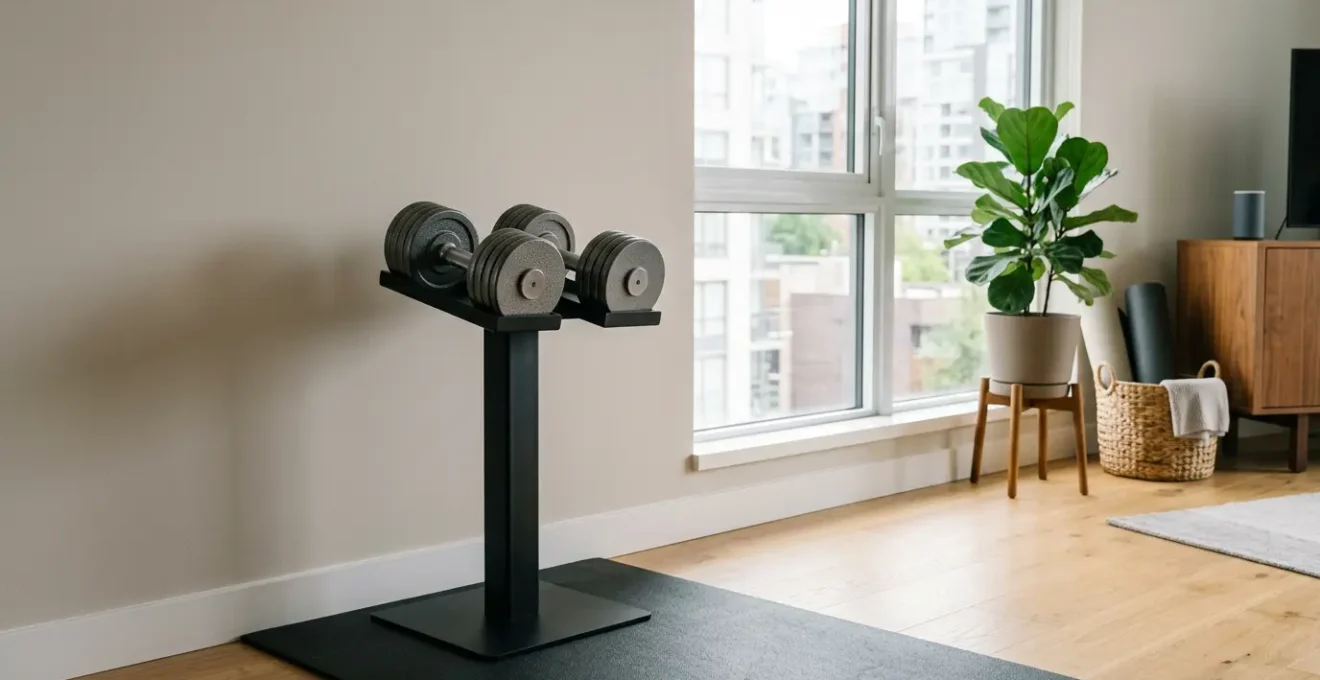
For the urban dweller with limited square footage, creating a functional home gym feels like a puzzle. The goal is clear: a full-body workout without sacrificing your living room. The obvious solution presented everywhere is a set of adjustable dumbbells. They promise to replace an entire rack of weights, saving precious space. This is the common advice, and while true, it’s dangerously incomplete. Most buyers focus solely on the initial price and the maximum weight, overlooking the critical factors that determine the true value of their investment.
The real challenge isn’t just finding a compact set of weights. It’s about finding a system that grows with you without costing a fortune in expansion kits, one that is durable enough to last for years, and safe enough to use in a confined space where a dropped weight is more than just a nuisance. This guide moves beyond the surface-level benefits of “saving space.” We will dissect the strategic choice you need to make, focusing on the hidden economics of expandability, the mechanical weak points of different locking systems, and the crucial safety techniques that are non-negotiable in an apartment setting.
This article provides a comprehensive framework for making a smart, long-term investment. We will explore the biomechanical advantages of dumbbells, analyze the true cost of different systems, and provide actionable checklists for maintenance and safe progression. By the end, you will be equipped to choose a set of adjustable dumbbells that not only fits your space but also aligns perfectly with your fitness goals and your budget for years to come.
Summary: A Strategic Guide to Buying Adjustable Dumbbells for Compact Spaces
- Why Dumbbells Recruit More Stabilizer Muscles Than Barbells?
- How to Choose Your First Dumbbell Set Without Underestimating Leg Strength?
- Selectorized vs Spin-Lock: Which Mechanism Lasts Longer?
- The Grip Error That Causes Dropped Weights and Foot Injuries
- When to Buy Heavier Weights: 3 Signs You Have Outgrown Your Set
- How to Safely Increase Weight Without Risking Joint Injury?
- The ‘Sucking In’ Mistake: Why Pulling Your Stomach In Ruins Stability?
- How to Get a Full Body Workout in a Hotel Room Using Only Bands?
Why Dumbbells Recruit More Stabilizer Muscles Than Barbells?
The first reason dumbbells are superior for a small apartment gym goes beyond just their compact footprint; it’s about the quality of the muscle activation they provide. When you lift a barbell, both hands are fixed on a single, stable bar. Your body can rely on this structure for balance. Dumbbells remove that crutch. Each arm must work independently, forcing your body to engage a complex network of smaller, often-neglected stabilizer muscles to control the movement. This creates a more functional and resilient physique.
Think of muscles like the rotator cuff in your shoulders, the serratus anterior along your ribs, and the deep core muscles surrounding your spine. These are the unsung heroes of injury prevention and true strength. Barbells and machines often allow your dominant side to compensate for the weaker one, masking and even worsening muscular imbalances. Dumbbells expose these weaknesses immediately. A wobbly dumbbell press is a clear signal that your stabilizers are working overtime, which is exactly the point. This increased demand is not just a feeling; it’s measurable.
For example, when performing a shoulder press, research comparing free weights versus machine exercises shows that dumbbells can elicit up to 50% greater activation in the anterior deltoid. This is because your body isn’t just pushing the weight up; it’s simultaneously fighting to keep it from moving side-to-side and front-to-back. By forcing this multi-directional stability, you’re not just building bigger muscles; you’re building a smarter, more coordinated neuromuscular system. This translates directly to better performance in everyday activities and a lower risk of injury, making every rep in your small apartment more effective.
How to Choose Your First Dumbbell Set Without Underestimating Leg Strength?
The most common and costly mistake new buyers make is selecting a dumbbell set based on their upper body strength alone. You might curl 30 lbs, but for exercises like squats, lunges, and Romanian deadlifts, you need significantly more weight to challenge your legs and glutes, which are the largest muscle groups in your body. Buying a set that maxes out at 50 lbs might seem sufficient at first, but you’ll outgrow it for lower body workouts within months, forcing you into expensive expansion kits or a complete replacement.
The smart approach is to plan your purchase around your future leg day needs. A good rule of thumb is to aim for a system that can eventually reach at least 75 lbs per hand. This ensures you have a long runway for progressive overload. This is where the concept of “expansion pathway” becomes critical. Some brands, like PowerBlock and Ironmaster, are designed to be expanded in stages. This allows you to start with a lighter, more affordable base set and invest in more weight only when you need it. However, the cost and availability of these expansion kits vary dramatically.
This is where a true value-oriented analysis is necessary. You must look beyond the initial sticker price and calculate the total cost to reach your target weight. The following table breaks down the long-term investment for two popular systems, revealing how the “cheaper” initial option can sometimes become more expensive as you progress.
This comparative data, based on a detailed analysis of leading adjustable dumbbell brands, highlights the long-term cost implications of your initial choice.
| Brand/Model | Base Set Price | Base Weight Range | Expansion Kit Cost | Max Expandable Weight | Total Cost (Max Weight) |
|---|---|---|---|---|---|
| PowerBlock Elite | $359 | 5-50 lbs per hand | Stage 2: ~$200, Stage 3: ~$140 | 90 lbs per hand | ~$700 |
| Ironmaster Quick-Lock | $619 | 5-75 lbs per hand | 120 lb kit: ~$179, 165 lb kit: additional | 165 lbs per hand | ~$800+ (max config) |
| PowerBlock Pro Series | $700+ | 5-50 lbs per hand | Multiple stages available | 175 lbs per hand (commercial) | $1000+ |
As you can see, while the Ironmaster set has a higher entry cost, it starts with a heavier base weight, potentially delaying the need for the first expansion. The PowerBlock Elite offers a lower initial investment but requires multiple staged purchases to reach its maximum potential. Your decision depends on your current budget and projected strength gains. Thinking about your future self is the key to a wise investment.
Selectorized vs Spin-Lock: Which Mechanism Lasts Longer?
The longevity of your adjustable dumbbells hinges entirely on the quality and design of their changing mechanism. This is the heart of the system and where a higher price often translates to better engineering. The two dominant designs are selectorized (like PowerBlock) and spin-lock (like Ironmaster). Understanding the trade-offs between them is key to choosing a set that will withstand years of use.
Selectorized dumbbells use a pin, dial, or slide to quickly select the desired weight. Their primary advantage is speed; changing weight takes mere seconds, which is ideal for supersets or drop sets. However, this convenience comes with mechanical complexity. These systems often contain plastic components, springs, and intricate locking parts that can be potential failure points, especially if the dumbbells are dropped or handled roughly. The precision of these internal parts is what you’re paying for. This illustration provides a close-up look at the kind of intricate mechanics involved.
As the image reveals, the tight tolerances and multiple moving parts require care. Spin-lock dumbbells, on the other hand, are mechanically simpler. They consist of a handle and several plates secured by a threaded locking screw. Their design is more robust and closer to a traditional dumbbell, with fewer small parts to break. The trade-off is speed; changing weight is a slower, more deliberate process. They are virtually indestructible if cared for, but the threads on the locking screws can wear down over time if cross-threaded or over-tightened. Ultimately, selectorized models offer convenience at the cost of potential fragility, while spin-locks offer durability at the cost of speed.
Regardless of the system you choose, preventative maintenance is non-negotiable for ensuring a long lifespan. Corrosion from sweat and dust accumulation in the mechanisms are the biggest enemies. A simple but consistent cleaning and inspection routine can prevent most common issues and ensure your investment remains safe and functional for years.
Your Action Plan: Preventative Maintenance Checklist for Adjustable Dumbbells
- Wipe down dumbbells with a damp cloth after each workout to remove sweat and chalk.
- Once a week, use compressed air to blow out dust and debris from adjustment mechanisms and between plates.
- Every month, check all locking pins, dials, and screws for signs of wear, looseness, or damage. Tighten any loose components as needed.
- For spin-lock models, lightly lubricate the threads of the locking screws every few months to ensure smooth operation and prevent seizing.
- Store your dumbbells in a dry, climate-controlled location to prevent rust and corrosion, especially if you live in a humid environment.
The Grip Error That Causes Dropped Weights and Foot Injuries
In a small apartment, there is zero margin for error. A dropped weight isn’t just loud; it’s a direct threat to your floors, your furniture, and most importantly, your feet. The single most common cause of this accident isn’t a faulty mechanism, but a simple error in grip technique. Many lifters hold the dumbbell passively, letting it rest in their palms. This is a recipe for disaster, especially as hands get sweaty and muscles fatigue. The correct approach is an active, conscious “crushing grip.”
This means you should be actively squeezing the handle throughout the entire lift, from the moment you pick it up to the moment you set it down. This technique does two things: first, it creates immense friction and locks the dumbbell securely in your hand. Second, it activates the entire kinetic chain from your hand up through your forearm and into your shoulder, creating more stability and control over the weight. The importance of this cannot be overstated, as a national study examining weight training-related injuries found that a staggering 65% of free weight injuries are caused by weights dropping on a person.
A proper crushing grip involves wrapping your thumb fully around the handle and squeezing as if you’re trying to leave fingerprints in the metal. The knurling—the textured pattern on the handle—is designed specifically for this purpose. It provides a high-friction surface for your skin to bite into. You should feel tension in your forearms when you do this correctly. This photo demonstrates the correct hand position and muscular engagement.
Mastering this grip is a non-negotiable safety protocol for home workouts. It’s not just about preventing drops; it’s about lifting with intention and control. A passive grip signifies a disengaged mind and body, which is when accidents happen. By actively crushing the handle, you are ensuring that every ounce of your focus is on controlling the weight, protecting yourself and your living space from a preventable and painful accident. Make this a conscious part of every single repetition.
When to Buy Heavier Weights: 3 Signs You Have Outgrown Your Set
Progressive overload is the fundamental principle of building strength, but how do you know when it’s time to actually invest in the next expansion kit for your adjustable dumbbells? Moving up too soon can waste money and risk injury, while waiting too long can lead to frustrating plateaus. There are three clear, objective signs that indicate you’ve truly maximized the potential of your current weight set and are ready for an upgrade.
The first and most important sign is your Reps in Reserve (RIR). This is the number of additional reps you could perform with good form at the end of a set. If you are consistently completing your target rep range (e.g., 8-12 reps) and feel you could have done 3 or more additional reps, the weight is no longer challenging enough to stimulate growth. When your RIR is consistently high on your main compound lifts (like squats, presses, and rows), it’s a clear signal to increase the load.
The second sign is a stall in performance. If you’ve been stuck at the same weight and rep scheme for several weeks despite consistent training, adequate nutrition, and proper rest, you may have hit the ceiling of what your current set can offer. Sometimes, the inability to make small, incremental jumps in weight is the bottleneck. If your dumbbell set only allows for 5 lb jumps, you might be stuck because a 10 lb increase (5 lbs per hand) is too much. This is a strong indicator that you need a system with smaller increments or a heavier max weight.
Finally, the third sign relates to workout efficiency. If you find yourself having to perform excessively high reps (20-30+) to feel a challenge, your training is shifting from strength-building to endurance. While this has its place, if your primary goal is muscle hypertrophy or maximal strength, it’s a sign that the load is too light. Your time is valuable, and a 45-minute workout shouldn’t be spent doing endless reps. Upgrading your weights allows you to get a more effective stimulus in a shorter amount of time. The a case study below illustrates how a modular system facilitates this progression.
Case Study: The PowerBlock Elite’s Expandability for Long-Term Progression
The PowerBlock EXP models are designed to address this exact issue, replacing up to 28 pairs of fixed dumbbells. As detailed in a thorough review of the PowerBlock system, users can start with a 5-50 lb base set, which is sufficient for most beginners. As strength increases and they consistently find themselves with 3 or more Reps in Reserve on their working sets, they can purchase expansion kits. The Pro EXP model, for instance, is expandable up to 90 lbs. This staged investment approach allows lifters to upgrade only when their performance dictates it, making the overall cost-per-pound highly favorable for long-term, strategic progression without a massive upfront cost.
How to Safely Increase Weight Without Risking Joint Injury?
Adding more weight to your dumbbells is exciting; it’s tangible proof of progress. However, this is also the moment when the risk of joint injury spikes. The “ego lift”—piling on weight before your connective tissues are ready—is a fast track to tendonitis, strains, and setbacks. Safely increasing weight requires a methodical, form-focused approach, especially when training alone in your apartment. The key is to prioritize joint stability over raw numbers.
The first rule is to use micro-loading. The smaller the weight increase, the better. A 5 lb jump per dumbbell (10 lbs total) might be manageable for a heavy leg press, but it’s a massive leap for a lateral raise or a bicep curl. This is where the increment system of your adjustable dumbbells is crucial. A set that offers 2.5 lb increments provides a significant advantage for safely progressing on isolation exercises, allowing your joints, tendons, and ligaments to adapt gradually alongside your muscles. If your set only allows 5 lb jumps, you can bridge the gap by first increasing reps with the lighter weight before attempting the heavier one.
The second principle is to master the controlled eccentric phase of the lift. This is the “lowering” portion of the movement (e.g., lowering the dumbbell in a bicep curl). When you increase the weight, your first few reps should focus intensely on a slow, 3-4 second negative. This builds tremendous control, strengthens connective tissues, and immediately reveals if you’re not ready for the new load. If you cannot control the eccentric—if the weight is dropping or you feel a sharp pain in your elbow or shoulder—you must reduce the weight immediately. Your body is telling you it’s not prepared.
Finally, never sacrifice range of motion for more weight. Performing a half-rep squat with 70 lbs is far less effective and far more dangerous than a full, deep squat with 60 lbs. Before increasing weight, ensure you can execute every rep of your set with a full, pain-free range of motion. A structured protocol is the best way to ensure you’re checking all the boxes before each weight increase.
Action Plan: Progressive Overload Safety Protocol
- Form Assessment: Film your last set with the current weight. Review the video to check for a stable back, controlled joint paths, and no momentum or swinging.
- Micro-Loading Strategy: Use the smallest possible increment (ideally 2.5 lbs) for smaller muscle groups and a 5 lb increment for large compound movements like squats and rows.
- Rep Reserve Check: Only increase the weight when you can consistently finish your target rep range with 0 to 2 reps left in the tank (RIR).
- Joint Stability Test: Perform the first 3-5 reps at the new weight with an exaggeratedly slow and controlled lowering phase. Any joint wobble or instability is a sign to drop back down.
- Planned Deload: Every 4 to 8 weeks, intentionally reduce your working weights by 10-20% for one week. This allows your joints and central nervous system to fully recover and supercompensate.
The ‘Sucking In’ Mistake: Why Pulling Your Stomach In Ruins Stability?
One of the most pervasive yet incorrect cues in fitness is to “suck your stomach in” during a lift. This advice, often given with good intentions to “engage the core,” actually does the opposite. It creates a weak, hollow, and unstable abdominal wall, drastically increasing the risk of lower back injury, especially during standing dumbbell exercises. The correct technique is not hollowing but bracing, and understanding the difference is fundamental to safe lifting.
Sucking in, or creating an “abdominal hollow,” primarily activates the transverse abdominis, the deepest layer of your abdominal muscles. While this muscle is important, this action pulls the abdominal wall inward, away from the spine, reducing internal pressure and creating a structurally weak column. Imagine trying to support a heavy weight with a soft, deflated pillar. This is what happens to your torso when you simply suck in. It leaves your lumbar spine vulnerable to shearing forces.
Proper core bracing, in contrast, involves contracting all of your core musculature—the rectus abdominis (your “six-pack”), obliques, and transverse abdominis—simultaneously. The most effective way to learn this is to imagine you are about to be punched in the stomach. Your instinctive reaction is to tighten everything, pushing your abdominal wall slightly outward. This action creates intra-abdominal pressure, turning your torso into a rigid, unyielding cylinder that protects your spine like a natural weightlifting belt. This stability is absolutely essential when handling heavy dumbbells, which constantly challenge your balance.
As Dr. Emily Carter, a Certified Strength and Conditioning Specialist, explains, the nature of free weights makes this core skill even more critical:
Dumbbells are crucial for developing stabilizer muscles, which are essential for joint health and injury prevention. Machines often bypass these muscles, leading to imbalances and increased risk of injury.
– Dr. Emily Carter, Certified Strength and Conditioning Specialist
This bracing technique should be applied to every single lift. Before you initiate a dumbbell row, squat, or overhead press, take a breath, brace your core as if preparing for impact, and only then begin the movement. This simple shift in technique from “sucking in” to “bracing” is one of the most powerful tools you have to prevent injury and build a truly strong, functional core.
Key Takeaways
- The best adjustable dumbbells for apartments are those with a cost-effective expansion path, not just a low initial price.
- Mastering a “crushing grip” and proper core bracing are the most critical safety measures to prevent common home workout injuries.
- Durability is key: Spin-lock mechanisms are generally more robust, while selectorized systems offer speed at the cost of mechanical complexity.
How to Get a Full Body Workout in a Hotel Room Using Only Bands?
While adjustable dumbbells are the gold standard for a permanent home gym, they aren’t portable. For travel or for those seeking an even more minimalist setup, resistance bands offer a surprisingly effective full-body workout. The key to making bands work is using smart programming, specifically antagonistic supersets. This involves pairing exercises that work opposing muscle groups (e.g., chest and back) back-to-back with minimal rest. This method maximizes metabolic stress and time efficiency, delivering a powerful workout in under 25 minutes.
A typical setup requires only a single resistance band with a door anchor, an accessory that turns any door into a versatile cable machine. For a push/pull superset, you can perform band push-ups (anchoring the band under your feet or across your back) immediately followed by band rows, with the band anchored to the door at chest height. This pairing ensures that while one muscle group is working, the other is actively recovering, allowing you to maintain a high intensity throughout the workout without fatiguing too quickly.
For the lower body, you can pair band goblet squats (standing on the band and holding the handles at shoulder level) with single-leg Romanian deadlifts. This combination targets the quads and glutes, then immediately hits the hamstrings and posterior chain. The unilateral nature of the single-leg RDL also heavily challenges your balance and core stability. The final piece of the workout can target the shoulders and core with a superset of band reverse woodchops and a split-stance shoulder press. This comprehensive approach ensures that every major muscle group is targeted with intensity.
Action Plan: Antagonistic Superset Band Workout for Travel
- Superset 1 – Push/Pull: 10-12 reps of Band Push-ups immediately followed by 10-12 reps of Band Rows (using a door anchor). Rest 60 seconds and repeat for 3 sets.
- Superset 2 – Lower Body: 10-12 reps of Band Goblet Squats immediately followed by 10 reps per leg of Band Single-Leg Romanian Deadlifts. Rest 60 seconds and repeat for 3 sets.
- Superset 3 – Core/Shoulders: 10 reps per side of Band Reverse Woodchops (anchor low) immediately followed by 10-12 reps of a Band Split-Stance Shoulder Press. Rest 60 seconds and repeat for 3 sets.
- Equipment Needed: One resistance band with a door anchor.
- Time Commitment: The entire workout can be completed in 20-25 minutes.
Ultimately, choosing the right equipment is about creating a sustainable and effective fitness routine that fits your life. By viewing the purchase of adjustable dumbbells not as a simple transaction but as a strategic, long-term investment in your health, you empower yourself to make a much smarter decision. It’s a choice that goes beyond saving space to building a safer, stronger, and more resilient body in the comfort of your own home. To make the most informed choice, it’s essential to start with the foundational principles of why this equipment is so effective.