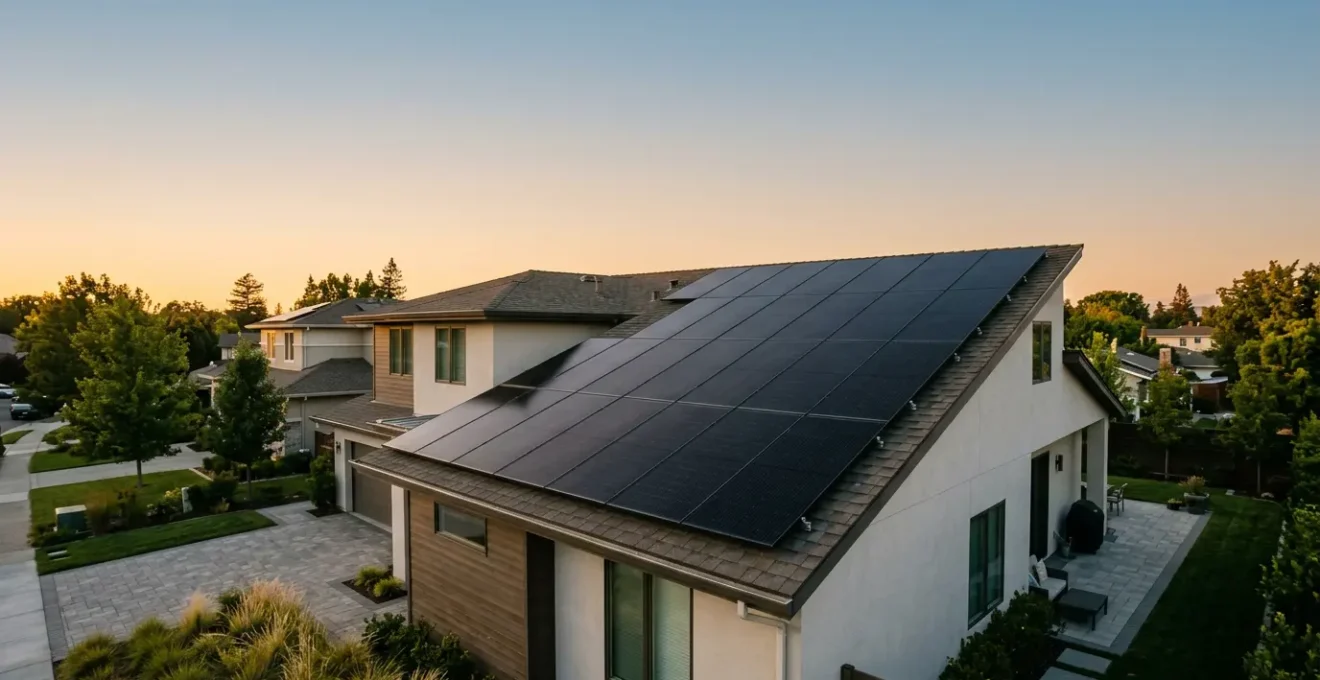
Calculating solar ROI is not about a simple payback period; it’s a financial exercise in de-risking a 25-year asset by mastering the hidden variables that separate a profitable investment from a costly mistake.
- Your real electricity cost is determined by Time-of-Use (TOU) rates, not just your total usage, which fundamentally changes system sizing and the need for batteries.
- Minor, unaddressed issues like partial shade or inefficient appliances create systemic bottlenecks that can disproportionately slash your system’s financial output for decades.
Recommendation: Before getting quotes, perform a “pre-investment optimization” audit of your home’s efficiency and future energy needs. Every dollar spent reducing consumption saves three to five dollars on the required size of your solar system.
For homeowners considering solar, the initial conversation often revolves around a single, alluring number: the payback period. You’re told that in X years, the system will have “paid for itself.” While appealing, this simplistic view is the number one reason for post-installation disappointment. It ignores the complex variables that can erode your return on investment over a system’s 25-year lifespan. Most online calculators and sales pitches treat your roof like a generic spreadsheet, failing to account for the unique financial risks and opportunities tied to your specific home and habits.
The common advice to “get multiple quotes” or “look at federal tax credits” is table stakes. It doesn’t equip you to critically evaluate those quotes or understand their underlying assumptions. The real key to a successful solar investment isn’t just generating power; it’s about turning your roof into a predictable, high-performing financial asset. This requires a shift in mindset: from a consumer buying a product to an investor managing risk. The true ROI isn’t found in a brochure; it’s calculated by mastering the details installers often gloss over.
But what if the most important factors for your solar ROI aren’t the panels themselves, but your electrical panel, your trees, and your dimmer switches? This guide is designed to move beyond the platitudes. We will not give you a simple calculator; we will give you the financial framework of a renewable energy consultant. We’ll dissect the critical, often-missed variables—from power outages to the fine print on your utility bill—that determine whether your solar installation becomes a source of energy independence or a source of financial regret.
This article provides a detailed framework for evaluating a solar investment from a risk-management perspective. Explore the key sections below to understand the variables that truly define your system’s long-term value.
Table of Contents: Calculating the Real ROI of Your Solar Investment
- Why You Lose Power During a Blackout Even With Solar Panels?
- How to Read Your Electricity Bill to Size Your System Correctly?
- Monocrystalline vs Polycrystalline: Is the Efficiency Jump Worth the Cost?
- The Tree Line Mistake: Why a Little Shade Can Kill System Output?
- Problem & Solution: Using Timers to Run Appliances When the Sun Shines
- How to Upgrade Your Electrical Panel for Level 2 Charging?
- Why Your Old Dimmer Switch Is Destroying Your New LED Fixtures?
- How to Identify Heat Leaks in Your Home Using a Thermal Camera?
Why You Lose Power During a Blackout Even With Solar Panels?
It’s the most jarring realization for new solar owners: a neighborhood blackout plunges their home into darkness, just like everyone else’s. The reason is a critical safety feature called “anti-islanding.” Standard grid-tied inverters are designed to shut down instantly when the grid fails. This prevents your panels from sending electricity into dead power lines, which could electrocute utility workers trying to make repairs. Without specific hardware, your solar array is useless during an outage, no matter how sunny it is. The grid isn’t just a place to sell excess power; it’s the operational backbone your system relies on to function.
This exposes a primary financial risk: you’ve invested in an energy asset that fails during the very events that make it most valuable. With the average US power outage duration now at 5.5 hours per customer annually and increasing in many regions due to extreme weather, the “cost of doing nothing” is tangible. The solution is to move from a simple grid-tied system to a hybrid system with battery storage. A modern hybrid inverter can safely disconnect from the grid during an outage (creating a secure “island” of power for your home) and use a battery to store solar energy for use when the sun isn’t shining.
This hybrid inverter is the key to unlocking true energy independence. The illustration below shows the core component that enables this “islanding” capability, serving as the brain that decides whether to pull from the grid, your panels, or your battery.
As you can see, this isn’t just a simple add-on; it’s a fundamental shift in system architecture. However, the decision to add a battery shouldn’t be emotional. It must be a calculated investment based on a cost-benefit analysis. A battery’s ROI depends entirely on the frequency and cost of outages in your specific area, balanced against the high upfront cost of the equipment. For many, a battery is not a tool for saving money, but an insurance policy against disruption.
Your Action Plan: Financial Framework for Battery Backup
- Calculate outage frequency and duration: Track historical power outage data for your specific region using utility reports or public tracking data to establish a baseline risk profile.
- Quantify financial losses per outage: Value lost remote work hours, assess spoiled food replacement costs, and factor in potential costs like a hotel or rental generator for multi-day events.
- Price battery system options: Research installed costs for both whole-home systems and “essentials-only” sub-panel systems, factoring in the required capacity (typically 10-15 kWh) for your needs.
- Calculate break-even timeline: Divide the total battery system cost by your annual expected outage losses. Be realistic; in stable grid areas, the financial payback period may exceed the battery’s lifespan.
- Factor in non-financial “insurance” value: Assign a personal monetary value to peace of mind, business continuity, medical device reliability, and the avoidance of stress to complete your personal ROI assessment.
Ultimately, a battery transforms your solar array from a part-time energy producer into a full-time, resilient power plant for your home. It’s a significant expense, but one that directly mitigates a primary weakness of standard solar installations.
How to Read Your Electricity Bill to Size Your System Correctly?
One of the most common and costly mistakes in solar planning is using a simple annual kWh consumption number to size a system. Your utility bill is not just a summary of usage; it’s a complex price signal. In many regions, utilities have moved to Time-of-Use (TOU) rates, where the price of electricity changes dramatically throughout the day. Power consumed during “peak” hours (e.g., 4-9 PM when solar production is low and demand is high) can cost two to three times more than power consumed “off-peak” in the middle of the day.
Sizing a system to offset 100% of your annual kWh usage is a flawed strategy under TOU rates. Your panels will overproduce cheap energy midday and leave you completely exposed to expensive energy in the evening. The goal is not to offset kilowatt-hours; it’s to offset cost. This requires a more sophisticated approach: analyzing your interval data (your usage pattern in 15-minute chunks, available from your utility’s online portal) to understand *when* you use energy, not just how much.
Under a TOU billing structure, a battery becomes less of a luxury and more of a financial necessity for maximizing ROI. The strategy shifts from simple “net metering” to “TOU arbitrage”: storing the cheap solar energy you generate midday and deploying it during the expensive evening peak, avoiding high-cost grid power entirely. This strategic self-consumption is the key to unlocking savings. In fact, adding a battery and smart management system is shown to increase a solar home’s self-consumption by 20-40%, directly targeting the most expensive hours.
The following table illustrates why a flat-rate sizing methodology is completely inadequate for a TOU-billed household. It highlights how the financial incentives and sizing strategy change dramatically when the cost of electricity is dynamic.
This detailed analysis, provided in a comparative guide on utility rates, shows why understanding your bill is the first step in a proper solar design.
| Rate Plan Component | Flat-Rate Billing | Time-of-Use (TOU) Billing | Impact on Solar System Sizing |
|---|---|---|---|
| Peak Period Pricing | Same rate 24/7 (e.g., $0.45/kWh constant) | 4-9 PM: $0.58-$0.74/kWh (varies by utility) | TOU requires larger system + battery to offset expensive evening usage when solar production drops |
| Off-Peak Pricing | N/A – constant rate | Overnight/midday: $0.24-$0.35/kWh | Enables strategic load shifting; can reduce required system size if behavior changes |
| Sizing Methodology | Size to annual kWh total ÷ 12 months | Size to peak-period consumption pattern + battery capacity for TOU arbitrage | TOU systems may need 20-40% more capacity to maximize savings vs. simple offset approach |
| Self-Consumption Strategy | Export excess to grid at retail rate | Store in battery for peak discharge; export value varies hourly | Battery becomes financially essential rather than optional for optimal ROI |
| Annual Bill Calculation | kWh × flat rate | Σ(peak kWh × peak rate) + Σ(off-peak kWh × off-peak rate) | Requires granular 15-minute interval data analysis from utility portal for accurate sizing |
Therefore, before you even speak to an installer, your first step is to become an expert on your own consumption patterns. Demand a proposal that isn’t based on your annual total, but on a detailed analysis of your interval data and a clear strategy to combat peak TOU rates.
Monocrystalline vs Polycrystalline: Is the Efficiency Jump Worth the Cost?
When evaluating solar panels, you’ll face a primary technology choice: monocrystalline or polycrystalline. Polycrystalline panels, with their speckled blue appearance, are the budget-friendly option. Monocrystalline panels, identifiable by their sleek, uniform black color, are more efficient but come at a premium. The critical question for an investor is whether that efficiency jump is worth the additional upfront cost. A simple comparison of price per watt is misleading; a true ROI calculation must model performance over the system’s 25-year lifetime.
Monocrystalline panels typically offer 17-22% efficiency, compared to 13-17% for polycrystalline. This means a monocrystalline panel generates more electricity from the same physical space. If your roof area is limited, this isn’t a choice—it’s a necessity. Trying to fit a lower-efficiency system on a small roof might mean you can’t install enough capacity to meet your energy needs, making the entire investment pointless.
However, the financial case for monocrystalline extends beyond just space constraints. Two often-overlooked factors are crucial for lifetime value: the degradation rate and the temperature coefficient. Monocrystalline panels degrade more slowly, retaining more of their original output after 25 years. They also perform better in high heat. A panel’s power rating is tested at a cool 25°C (77°F), but on a hot roof, its output drops. Because monocrystalline panels have a better temperature coefficient, they maintain higher performance during the hottest, sunniest parts of the day—precisely when you need them most.
The following 25-year ROI model breaks down how these seemingly small technical advantages compound into significant financial gains over the life of the system. An analysis by EcoWatch on panel technologies provides the framework for this long-term comparison.
| Financial Factor | Monocrystalline Panels | Polycrystalline Panels | ROI Impact Over 25 Years |
|---|---|---|---|
| Initial Cost per Watt | Higher (premium 15-20% more) | Lower (baseline cost) | Example: $3.00/W vs. $2.50/W for 7kW system = $3,500 difference upfront |
| Efficiency Rating | 17-22% (more kWh per sq ft) | 13-17% (less kWh per sq ft) | Mono produces ~15-30% more electricity from same roof area over system lifetime |
| Degradation Rate | 0.3-0.5% annually (slower) | 0.5-0.8% annually (faster) | After 25 years: Mono retains 87.5-92.5% vs. Poly retains 80-87.5% of original output |
| Temperature Coefficient | Lower (-0.3% to -0.4%/°C) | Higher (-0.4% to -0.5%/°C) | In hot climates (Phoenix, Las Vegas): Mono maintains 5-8% higher output during peak summer production |
| Roof Space Constraint ROI | Only viable option if space limited | Requires 15-30% more roof area | Constrained roofs: Mono ROI becomes infinite (poly system physically won’t fit or meet energy needs) |
| Aesthetic Impact on Resale | Sleek black uniform appearance | Blue speckled appearance | Home appraisers report 2-4% higher perceived value for premium mono installations |
For homeowners in hot climates or with limited roof space, the higher upfront cost of monocrystalline panels is not just a premium for aesthetics; it’s a calculated investment in superior lifetime production and a more robust financial return.
The Tree Line Mistake: Why a Little Shade Can Kill System Output?
Shade is the silent killer of solar ROI. Many homeowners underestimate its impact, assuming that if a panel is only shaded for a small part of the day, the loss is minimal. This is a catastrophic misunderstanding of how traditional solar systems work. In a standard setup using a string inverter, panels are wired together in series, like old-fashioned Christmas lights. If one panel’s output drops due to shade from a tree, chimney, or even a vent pipe, the performance of the *entire string* of panels is dragged down to that low level.
This creates a massive systemic bottleneck. A single swaying tree branch can effectively neutralize a third of your roof’s production for hours a day. The solution to this problem lies in Module-Level Power Electronics (MLPEs), such as microinverters or power optimizers. Instead of one large string inverter, microinverters place a small inverter on the back of each individual panel. This allows every panel to operate independently. If one panel is shaded, only that single panel’s output is reduced, while the rest of the system continues to produce at full power.
While MLPEs add to the upfront cost of a system, they are essential for any roof with even partial or intermittent shading. Failing to account for shade is not just an oversight; it’s a guaranteed way to destroy your financial returns. A professional shade analysis, using software to model the sun’s path and tree growth over 25 years, is non-negotiable. This isn’t about avoiding shade; it’s about quantifying its financial impact and investing in the correct technology to mitigate it.
Case Study: The Financial Crossover of Shade Mitigation
A detailed ROI analysis comparing two identical 6.9 kW systems over 25 years demonstrates the tipping point. System A (string inverter) has a lower initial cost. System B (microinverters) is more expensive upfront. In full sun, System A is the winner. However, with just 15% annual shading—a common scenario—the string inverter system loses up to 40% of its total output, while the microinverter system loses only the 15% from the directly affected panels. This performance gap translates to hundreds of dollars in lost production value each year. The analysis shows the financial crossover occurs around year 7, after which the microinverter system’s cumulative recovered energy value surpasses its higher initial cost, delivering thousands more in value over the system’s lifetime.
The takeaway is clear: don’t let an installer tell you shade “isn’t a big deal.” Demand a detailed, year-round shade report and a clear explanation of the technology they propose to de-risk its impact on your 25-year investment.
Problem & Solution: Using Timers to Run Appliances When the Sun Shines
Maximizing the ROI of your solar investment isn’t just about production; it’s about consumption. The most valuable solar energy is the energy you use directly in your home, a concept known as self-consumption. Every kilowatt-hour you self-consume is a kilowatt-hour you don’t have to buy from the utility at their full retail rate. This is far more profitable than exporting excess power to the grid, for which you are often compensated at a lower wholesale rate.
The key strategy to boost self-consumption is load shifting: consciously running your high-energy appliances during the middle of the day when your solar production is at its peak. This means running the dishwasher, washing machine, or pool pump at 1 PM instead of 8 PM. By aligning your demand with your free solar supply, you directly reduce the amount of expensive electricity you need to pull from the grid in the evening. This is especially critical for homeowners on Time-of-Use (TOU) rate plans, as it shifts consumption away from the priciest peak hours.
This load shifting can be accomplished in two ways: manually or automatically. The manual approach is the simplest, using inexpensive smart plugs or built-in appliance timers to schedule tasks. However, this relies on your discipline to set and maintain schedules. The more advanced solution is an automated Home Energy Management System (HEMS). These systems integrate with your solar inverter and battery, monitoring production and home consumption in real-time. They can automatically turn on appliances like your water heater or EV charger when there is excess solar power available, optimizing your self-consumption without any manual effort.
While a HEMS has a higher upfront cost, it eliminates “optimization fatigue” and ensures your system is always working to maximize value. The choice between manual timers and a full HEMS is another ROI calculation, balancing upfront cost against the potential for increased long-term savings and convenience.
Ultimately, a solar array provides the supply, but managing your demand through strategic load shifting is what unlocks the highest level of savings and accelerates your journey to energy independence.
How to Upgrade Your Electrical Panel for Level 2 Charging?
Your home’s main electrical panel is the unsung hero of any energy upgrade. It’s the central hub that distributes power, and if it’s outdated or undersized, it becomes a major bottleneck for electrification projects like solar and EV charging. Many older homes have 100-amp or 150-amp panels that are already near capacity. Adding a 40-amp circuit for a Level 2 EV charger and another 40-amp circuit for a 7.6kW solar inverter can easily exceed the panel’s safety limits, forcing a costly and disruptive upgrade.
Thinking about your electrical panel is a critical part of pre-investment optimization. If a panel upgrade is likely within the next 5-10 years (due to a planned EV purchase, a switch to a heat pump, or adding a hot tub), it is vastly more cost-effective to do it *at the same time* as your solar installation. The electricians are already on site, permits are being pulled, and the work can be bundled. Performing these as two separate projects can nearly double the total cost.
A forward-thinking homeowner should perform a future load calculation. This isn’t just about your current needs; it’s about anticipating your needs in 10 years. Will you have one EV or two? Will you replace your gas furnace with a heat pump? The goal is to upgrade your panel once, correctly. Upgrading from a 100-amp to a 200-amp panel is common, but for a fully electrified home with two EVs and a solar battery system, a 400-amp service may be the most prudent long-term investment. This ensures you have the capacity to handle future technologies without facing another expensive bottleneck.
The image below shows a modern, high-capacity electrical panel, the foundation of a future-ready, all-electric home. It represents a clean, professionally installed hub ready to manage the two-way flow of energy from solar, batteries, and the grid.
This is not an area to cut corners. An undersized panel not only limits your future options but can also become a safety hazard. A proper assessment and potential upgrade are fundamental to de-risking your entire home energy strategy.
Consult with your solar installer and a licensed electrician to conduct a thorough load calculation. Investing in the right-sized panel today is one of the smartest ways to ensure the long-term viability and value of your solar and EV investments.
Why Your Old Dimmer Switch Is Destroying Your New LED Fixtures?
The most powerful strategy for maximizing your solar ROI happens before a single panel is installed on your roof. It’s the principle of pre-investment optimization through energy efficiency. Every watt of electricity you save through efficiency upgrades is a watt you don’t need to generate. This has a massive ripple effect on the total cost of your solar system. A smaller energy footprint means a smaller, less expensive solar array and potentially a smaller battery, leading to thousands in upfront savings.
Think of it this way: spending $1,000 on sealing air leaks, adding insulation, or upgrading to high-efficiency appliances could reduce your home’s annual energy consumption by 10-20%. This reduction might allow you to install a 6kW solar system instead of an 8kW system. At an average cost of $3 per watt, that 2kW reduction saves you $6,000 on the solar installation. The ROI on the initial efficiency investment is staggering. In fact, comprehensive energy efficiency analysis shows that for every $1,000 invested in targeted efficiency upgrades, a homeowner can often reduce the required size of their solar system by an amount that saves them $3,000.
This concept extends to the smallest details. The title of this section might seem oddly specific, but it illustrates a systemic point. An old incandescent dimmer switch is not compatible with new LED bulbs; it can cause them to flicker, buzz, and fail prematurely. You’ve invested in efficient lighting, but a small, incompatible component is destroying its value and lifespan. The same logic applies to your entire home. An old, inefficient refrigerator running 24/7 or leaky, uninsulated ductwork for your HVAC system are “energy vampires” that artificially inflate your consumption, forcing you to buy a larger, more expensive solar system to compensate.
Before you calculate the ROI of a solar array, you must first calculate the ROI of efficiency. Treating the “house as a system” and plugging the energy leaks first is the single most impactful financial decision you can make. It’s the difference between putting a powerful engine in a leaky boat versus a sleek, hydrodynamic one.
Therefore, a home energy audit, whether professional or a thorough DIY-assessment, should be the mandatory first step in any solar journey. It provides the roadmap for the smartest, most cost-effective path to energy independence.
Key Takeaways
- Solar ROI is a 25-year calculation; short-term payback is a misleading metric that ignores critical factors like equipment degradation, shade, and changing utility rates.
- Pre-investment in energy efficiency is paramount. Every dollar spent reducing your home’s energy consumption saves several dollars on the required size and cost of your solar system.
- The best technology (e.g., monocrystalline panels, microinverters) often has a higher upfront cost but delivers a superior long-term ROI by mitigating risks like heat, degradation, and shade.
How to Identify Heat Leaks in Your Home Using a Thermal Camera?
Following the principle of “efficiency first,” the most effective way to identify and prioritize energy-saving upgrades is to make the invisible visible. A thermal imaging audit is the most powerful diagnostic tool for this purpose. By viewing your home through a thermal camera, you can physically see where expensive heated or cooled air is escaping. Cold spots on your walls in winter reveal missing insulation, and bright hot spots around windows and doors show precisely where you need to add weatherstripping and caulk.
This isn’t an academic exercise; it’s a financial treasure map. A thermal audit allows you to move from guessing to knowing. Instead of randomly deciding to replace windows (a very expensive upgrade with a long payback), an audit might reveal that your biggest energy losses are from an uninsulated attic hatch and leaky recessed lighting fixtures—fixes that cost a fraction of the price and offer an immediate return on investment.
By quantifying and ranking these “heat leaks,” you can create a targeted action plan, starting with the “low-hanging fruit.” These are typically air sealing and insulation tasks that have a payback period of less than two years. Tackling these first creates immediate savings on your utility bills and, more importantly, directly lowers the baseline energy consumption that your future solar system will need to offset. Each sealed crack and insulated joist reduces the required size and cost of your eventual solar investment.
Conducting a thermal audit before getting solar quotes is the ultimate form of pre-investment optimization. It provides you with the data to right-size your system based on your home’s *optimized* energy needs, not its current, inefficient state. This ensures you are not over-investing in a larger-than-necessary solar array to power a home that is needlessly wasting energy.
Embracing this data-driven approach to efficiency is the final step in shifting from a passive energy consumer to a proactive manager of your home’s financial and energy performance, setting the stage for a truly profitable solar investment.